Fast and Accurate Image Super Resolution by Deep CNN with Skip Connection and Network in Network
by Jin Yamanaka, Shigesumi Kuwashima and Takio Kurita
Overview (Ver 2.)
This is a tensorflow implementation of "Fast and Accurate Image Super Resolution by Deep CNN with Skip Connection and Network in Network", a deep learning based Single-Image Super-Resolution (SISR) model. We named it DCSCN. If you are checking the paper's code and results, please check ver1 branch.
The model structure is like below. We use Deep CNN with Residual Net, Skip Connection and Network in Network. A combination of Deep CNNs and Skip connection layers is used as a feature extractor for image features on both local and global area. Parallelized 1x1 CNNs, like the one called Network in Network, is also used for image reconstruction.
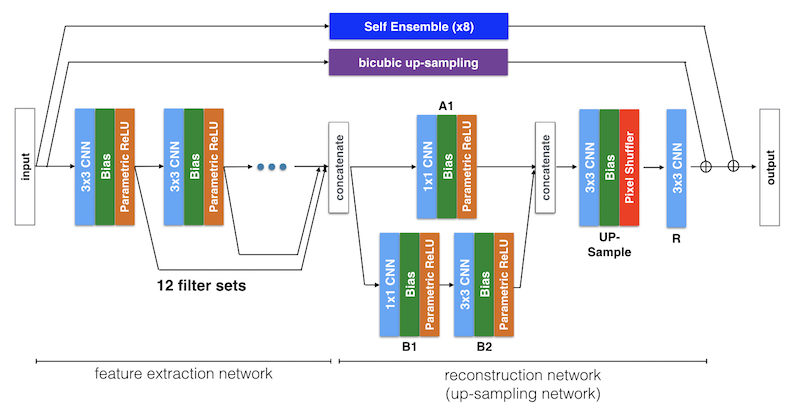
As a ver2, we also implemented these features.
-
Pixel Shuffler from "Real-Time Single Image and Video Super-Resolution Using an Efficient Sub-Pixel Convolutional Neural Network"
-
Transposed-CNN (optional) from "Fully Convolutional Networks for Semantic Segmentation"
-
Self Ensemble from "Seven ways to improve example-based single image super resolution"
-
Clipping Normalization (Gradient clipping)
-
Dynamically load training images (optional)
-
Add extra layers / Update default parameters for better PSNR result
-
Depthwise Separable Convolutions from "Xception: Deep Learning with Depthwise Separable Convolutions". Added by Chew Jing Wei Depthwise separable convolutions reduce the complexity of your model because it splits the computation of a traditional convolutional layer into two steps. The first step is to perform a depthwise convolution, meaning each input channel is convolved in isolation of other channels, then the second step is to perform a pointwise convolution, where the stacked output of each depthwise filter is convolved by a 1x1 filter which determines the final number of output channels in that layer. For a more complete yet beginner-friendly explanation, please see https://towardsdatascience.com/a-basic-introduction-to-separable-convolutions-b99ec3102728
Sample result
| Input image (orange) and x4 bicubic | Our DCSCN output |
|---|---|
 |
 |
Our model, DCSCN was much lighter than other Deep Learning based SISR models which is ver 1. As a ver2, we use larger model and recent technics to get a better image restoration performace.
Requirements
python >= 3.5 tensorflow >= 2.0.0, scipy, numpy, pillow, imageio, and scikit-image
Result of PSNR
The sample result of default parameter is here. The model is trained by DIV2k with 150,000 48x48 images for one epoch.
| Dataset | Scale | Bicubic | c-DCSCN (ver1) | DRCN | VDSR | DCSCN (ver2) | DRRN |
|---|---|---|---|---|---|---|---|
| set5 | x2 | 33.66 | 37.15 | 37.63 | 37.53 | 37.79 | 37.74 |
| x3 | 30.39 | 33.09 | 33.82 | 33.66 | 34.06 | 34.03 | |
| x4 | 28.42 | 30.85 | 31.53 | 31.35 | 31.72 | 31.68 | |
| set14 | x2 | 30.24 | 32.74 | 33.04 | 33.03 | 33.25 | 33.23 |
| x3 | 27.55 | 29.47 | 29.76 | 29.77 | 29.95 | 29.96 | |
| x4 | 26.00 | 27.76 | 28.02 | 28.01 | 28.25 | 28.21 | |
| bsd100 | x2 | 29.56 | 31.61 | 31.85 | 31.90 | 32.00 | 32.05 |
| x3 | 27.21 | 28.52 | 28.80 | 28.82 | 28.89 | 28.95 | |
| x4 | 25.96 | 27.06 | 27.23 | 27.29 | 27.35 | 27.38 |
Results and model will be uploaded in some days!!
Evaluate
Learned weights for some parameters are included in this GitHub. Execute evaluate.py with these args below and you get results in output directory. When you want to evaluate with other parameters, try training first then evaluate with same parameters as training have done. Results will be logged at log.txt, please check.
Some pre-trained models are included.
# evaluating set14 dataset
python3 evaluate.py --test_dataset=set14 --save_results=true

# evaluating set5 dataset with small model
python3 evaluate.py --test_dataset=set5 --save_results=true --layers=8 --filters=96

# evaluating all(set5,set14,bsd100) dataset
python3 evaluate.py --test_dataset=all

# evaluate our compact version of DCSCN (c-DCSCN)
python3 evaluate.py --scale=2 --layers=7 --filters=32 --min_filters=8 --filters_decay_gamma=1.2 --nin_filters=24 --nin_filters2=8 --reconstruct_layers=0 --self_ensemble=1 --batch_image_size=32 --pixel_shuffler_filters=1 --test_dataset=all
Apply to your own image
Place your image file in this project directory. And then run "sr.py --file 'your_image_file'" to apply Super Resolution. Results will be generated in output directory. Please note you should use same args which you used for training.
If you want to apply this model on your image001.png file, try those.
# apply super resolution on image001.jpg (then see results at output directory)
python3 sr.py --file=your_file.png

# apply super resolution with small model
python3 sr.py --file=your_file.png --layers=8 --filters=96
How to train with your own dataset
You can train with any datasets. Put your image files as a training dataset into the directory under data directory, then specify with --dataset arg. Since There are some important hyper paramters to train, please check args.py to use other training parameters.
Once training parameters has been given, "model name" will be defined by the parameters. For ex, when you use default parameters, "model name" would be like "dcscn_L12_F196to48_NIN_A64_PS_R1F32" and this name represents model structure.
# training for x2 with bsd200 dataset
python3 train.py --dataset=bsd200 --training_images=80000

# training for x3 scale with your own dataset
python3 train.py --scale=3 --dataset=[your own data directory]

# training for x2 with transposed CNN instead of using Pixel Shuffler layer for up-sampling
python3 train.py --dataset=bsd200 --training_images=80000 --pixel_shuffler=false
- Each training and evaluation summary will be added to log.txt.
- Model will be saved under models/"model name".ckpt
- Evaluation result images would be generated under output/"model name"/data/[dataset directory name]
- When you use evaluate.py / sr.py, please use completely same args with training so that the script can load your own learned "model name".ckpt.
Using small model for training/test (for CPU)
In case 1)you're using CPU, 2)training data is small or 3)just want to test if it works, I recommend you to use smaller model. And 8 layers with 96 filters model has enough performance for my DCSCN. When you're using CPU, 4-6 layers with 32-64 filters would be a good starting point.
# training for x2 with smaller model
python3 train.py --dataset=bsd200 --layers=8 --filters=96 --training_images=30000

# training for x2 with tiny model for test
python3 train.py --dataset=set5 --layers=4 --filters=32 --use_nin=false --training_images=10000
We propose compact verison of DCSCN (c-DCSCN) in my paper. When you want to try training with this model, use these option below. (x2 scale)
python3 train.py --scale=2 --layers=7 --filters=32 --min_filters=8 --filters_decay_gamma=1.2 --nin_filters=24 --nin_filters2=8 --reconstruct_layers=0 --self_ensemble=1 --dataset=yang_bsd_8 --training_images=228688 --batch_image_size=32 --build_batch=True --do_benchmark=True --pixel_shuffler_filters=1
Speeding up training
Please note loading/converting batch images for each training is a bit heavy process since there will be a lot of iterations. Here are some options. You can use those option to reduce training time significantly.
- Use "convert_y.py" to convert your dataset images to Y-channel monochrome bitmap.
If your training data is compressed like PNG or jpeg and the image resolution is larger, you must convert it before. Especially for DIV2K dataset, you can save a big time for decompressing and converting image process. Also in this mode, each input batch image may be flipped horizontally by the probability of 50%.
- Use "--build_batch True" option for smaller dataset
If your dataset is small enough to store in CPU memory, please use this. It will split source images into batch images and save to reuse before the training. When you're using HDD(not SSD) and the dataset is not large like (Yang91 + BSD200) augmented by 8 methods, this option is nice. It will avoid loading/converting process for each batch.
In this case, batch image positions are adjusted and limited to be on the grid with the half of batch_image_size. However, as far as I experimented, that doesn't affect to PSNR performance so much.
How can I set --training_images parameter?
--training_images is, the number of patches trained in one epoch. So, usually, it would be better to be same as the number of input training patch images. When you use build_batch=True, the trainer will create a patch images under "batch_data" before training so that you can see how much batch images are in the train data.
However, it really depends on the image type/variance and model complexity. You can begin with very small value like 1,000 and if the result is not enough, you can increase it until 100,000 to 200,000.
Important parameters
| Parameter arg | Name | Default | Explanation |
|---|---|---|---|
| layers | Num CNN layers | 12 | Number of layers of feature-extraction CNNs |
| filters | Num of first CNN filters | 196 | Number of filters of the first feature-extraction CNNs |
| min_filters | Num of last CNN filters | 48 | Number of filters of the last feature-extraction CNNs |
| filters_decay_gamma | Decay Gamma | 1.5 | Number of CNN filters are decayed from [filters] to [min_filters] by this gamma on each layers |
| pixel_shuffler | Pixel Shuffler | True | Use Pixel Shuffler as up-sampling layer. If it's False, use transposed CNN as up-sampling layer. |
| self_ensemble | Self Ensemble | 8 | Apply SR for 1-8 flipped/rotate images and then use mean image as result. |
| training_images | Batch images for training epoch | 24000 | This number of batch images are used for training one epoch. I usually use 100,000 batch images for each 10 epochs for each Learning Rate. |
| dropout_rate | Dropout rate | 0.8 | Output nodes should be kept by this probability. Should be 1 >= drop out > 0. If 1, don't use dropout. |
| initializer | Initialize method | he | Initialize method of each weight. Can be one of [uniform, stddev, xavier, he, identity, zero]. |
| activator | Activator function | prelu | Type of activator functions for each CNN. Can be one of [relu, leaky_relu, prelu, sigmoid, tanh] |
| optimizer | Optimizer function | adam | Method of optimizer. Can be one of [gd, momentum, adadelta, adagrad, adam, rmsprop] |
| batch_image_size | Image size for each Batch | 48 | Each training image will be splitted this size. |
| batch_num | Image num for each batch | 20 | Number of batch images for one training step. |
| clipping_norm | value for gradient clipping | 5 | Norm for gradient clipping. If it's <= 0 we don't use gradient clipping. |
Also learning late and other model parameters are still important.
We'll train [ training_images / batch_num ] steps for each epoch. Learning rate will be started from initial_lr. After [lr_decay_epoch] epochs has done, learning rate will be decayed by lr_decay. And when the current learning rate gets lower than end_lr, then training will be finished.
Usually you can control how much iterate the training batch by adjusting training_images and lr_decay_epoch. Please check arg.py for other params.
Data augmentation
To get a better performance, data augmentation is needed. You can use augmentation.py to build an augmented dataset. The arg, augment_level = 4, means it will add right-left, top-bottom and right-left and top-bottom fillped images to make 4 times bigger dataset. And there yang91_4 directory will be generated as an augmented dataset.
To have better model, you should use larger training data like (BSD200 + Yang91) x (8 augment) dataset.
# build 4x augmented dataset for yang91 dataset (will add flipped images)
python3 augmentation.py --dataset=yang91 --augment_level=4

# build 8x augmented dataset for yang91 dataset (will add flipped and rotated images)
python3 augmentation.py --dataset=yang91 --augment_level=8

# train with augmented data
python3 train.py --dataset=yang91_4
How to calculate PSNR / SSIM
RGB image is converted to YCbCr image. And then trained and applied only for Y channel.
For PSNR, by the default, result and original image are shaved by 'scale' pixels from each border, rounded to integer and then PSNR and SSIM are calculated. I use SSIM index calculation procedure from scikit-image. Parameters are here. (win_size=11, gaussian_weights=True, multichannel=True, K1=0.01, K2=0.03, sigma=1.5, data_range=255) (9/16/2018 modified)
Visualization
During the training, tensorboard log is available under tf_log directory.
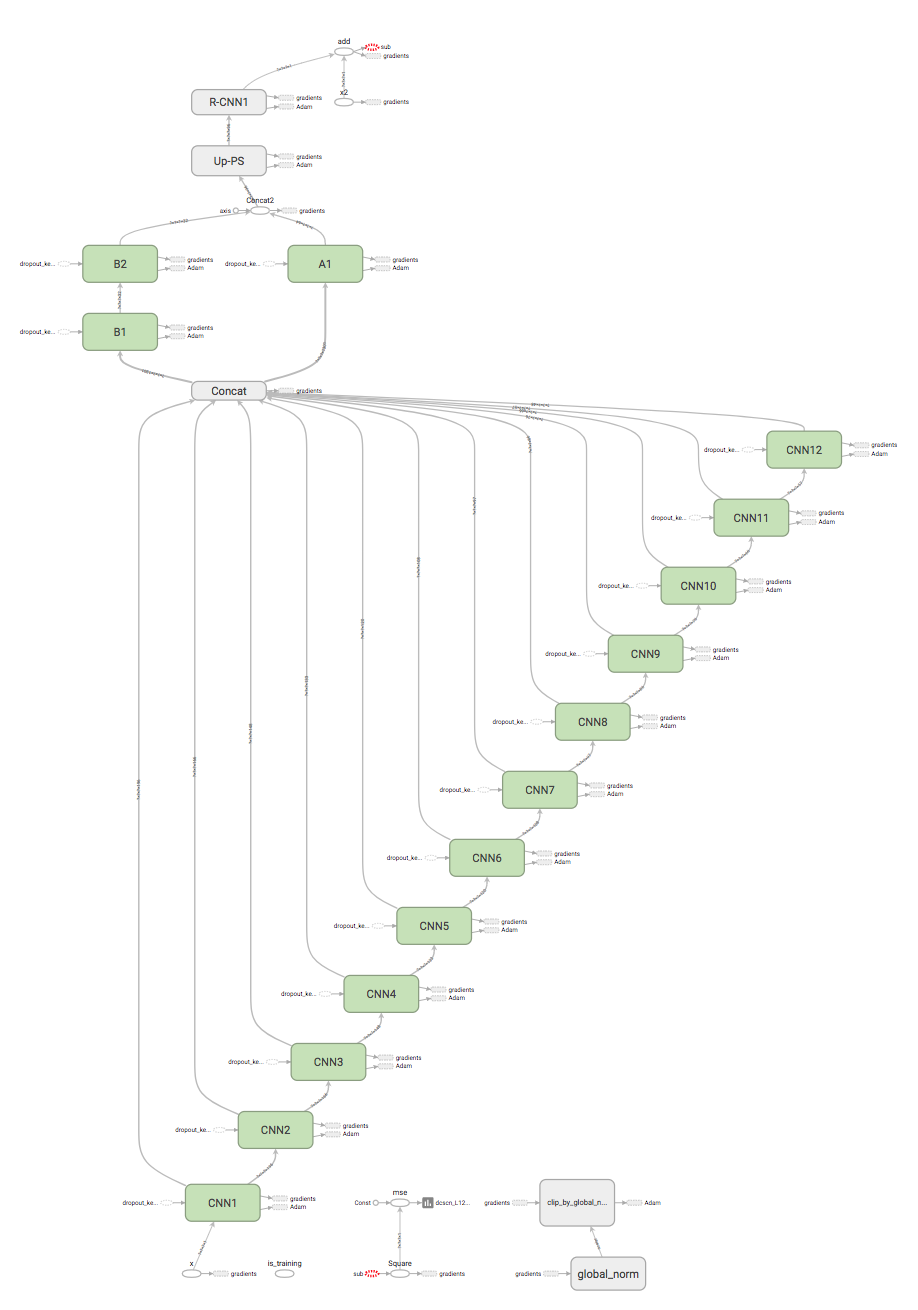
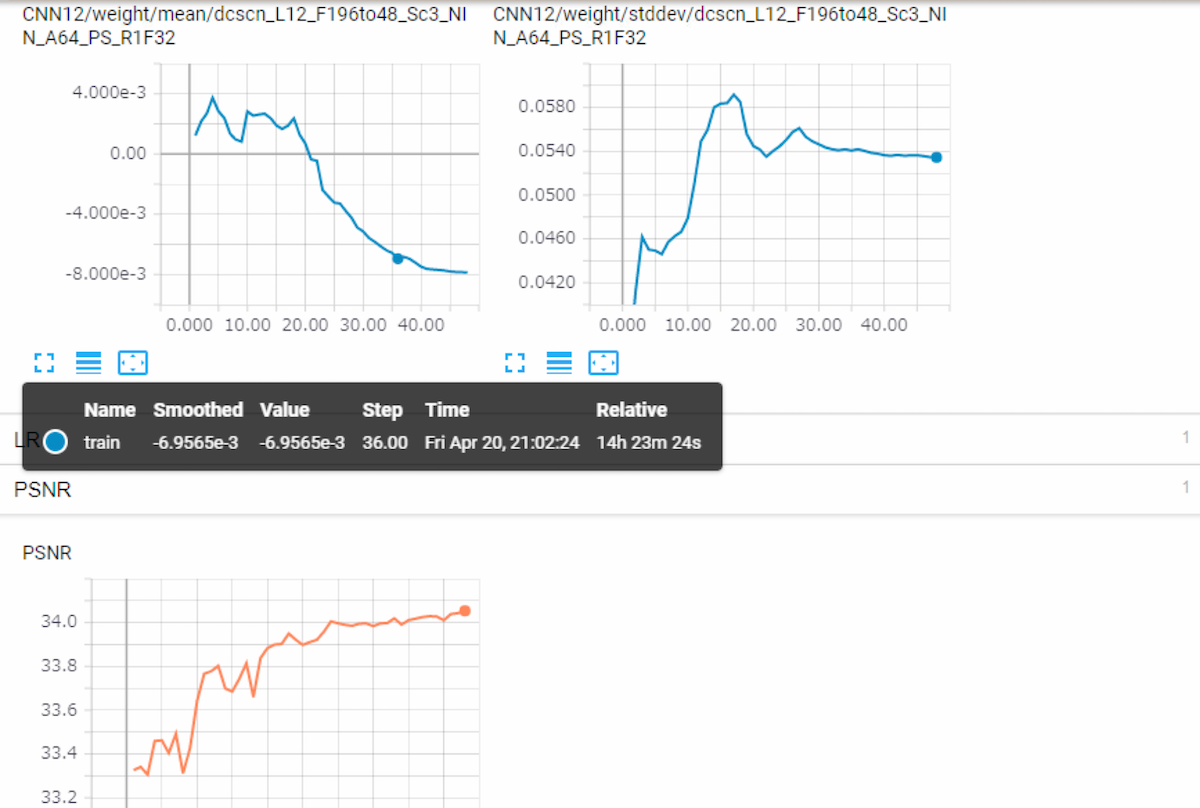
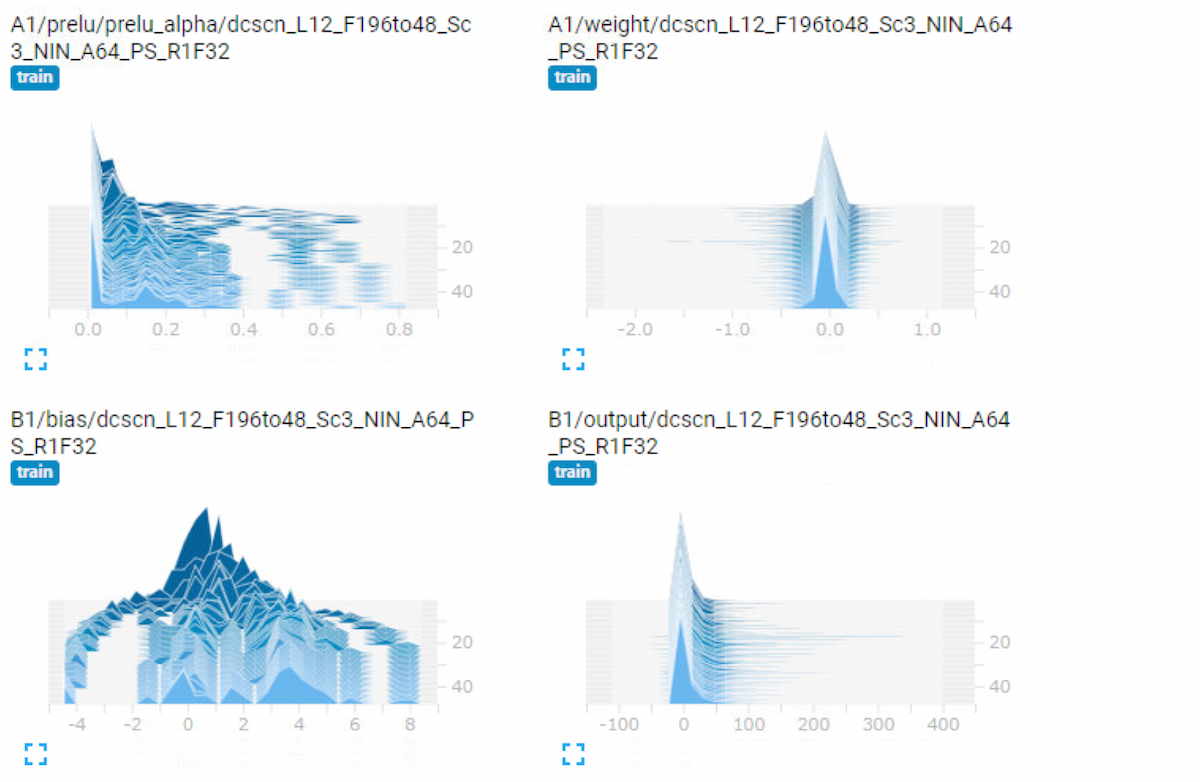
You can check test PSNR transition during training. Also mean / std / histogram of every weights/biases and gradients are logged at tensorboard.