RePaint
Inpainting using Denoising Diffusion Probabilistic Models
CVPR 2022 [Paper]
Setup
1. Code
git clone https://github.com/andreas128/RePaint.git
2. Environment
pip install numpy torch blobfile tqdm pyYaml pillow # e.g. torch 1.7.1+cu110.
3. Download models and data
pip install --upgrade gdown && bash ./download.sh
That downloads the models for ImageNet, CelebA-HQ, and Places2, as well as the face example and example masks.
4. Run example
python test.py --conf_path confs/face_example.yml
Find the output in ./log/face_example/inpainted
Note: After refactoring the code, we did not reevaluate all experiments.
RePaint fills a missing image part using diffusion models
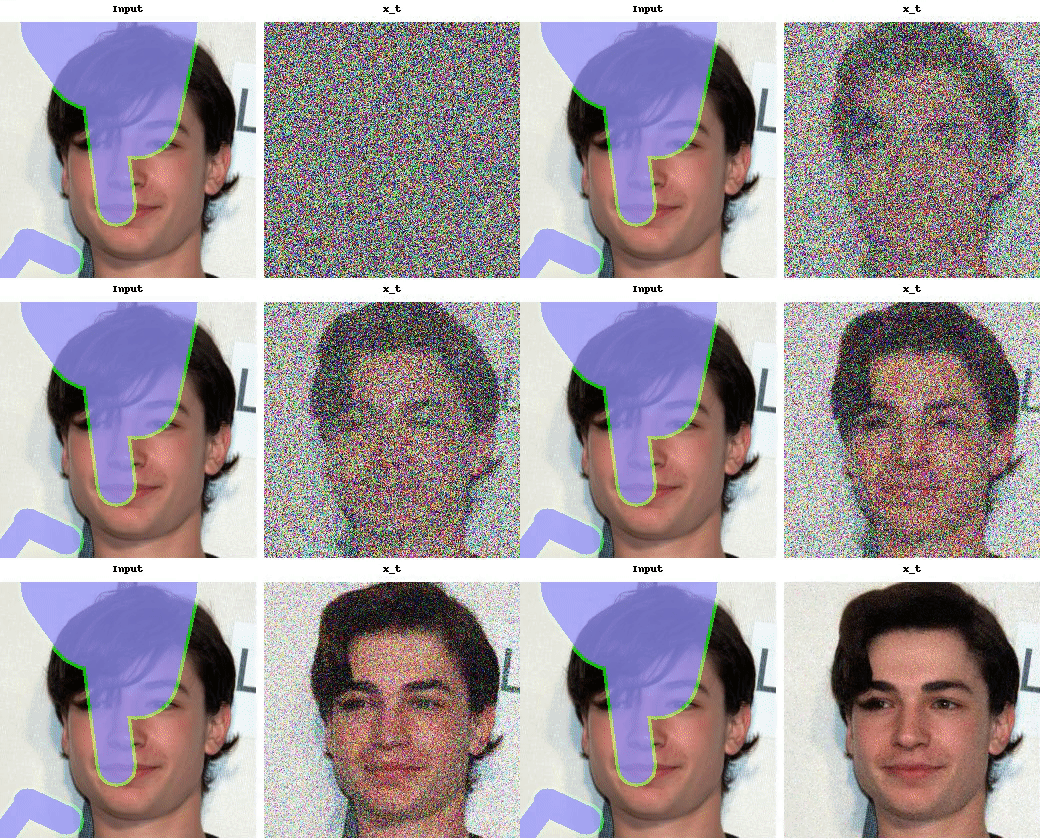

What are the blue parts?
Those parts are missing and therefore have to be filled by RePaint.
RePaint generates the missing parts inspired by the known parts.
How does it work?
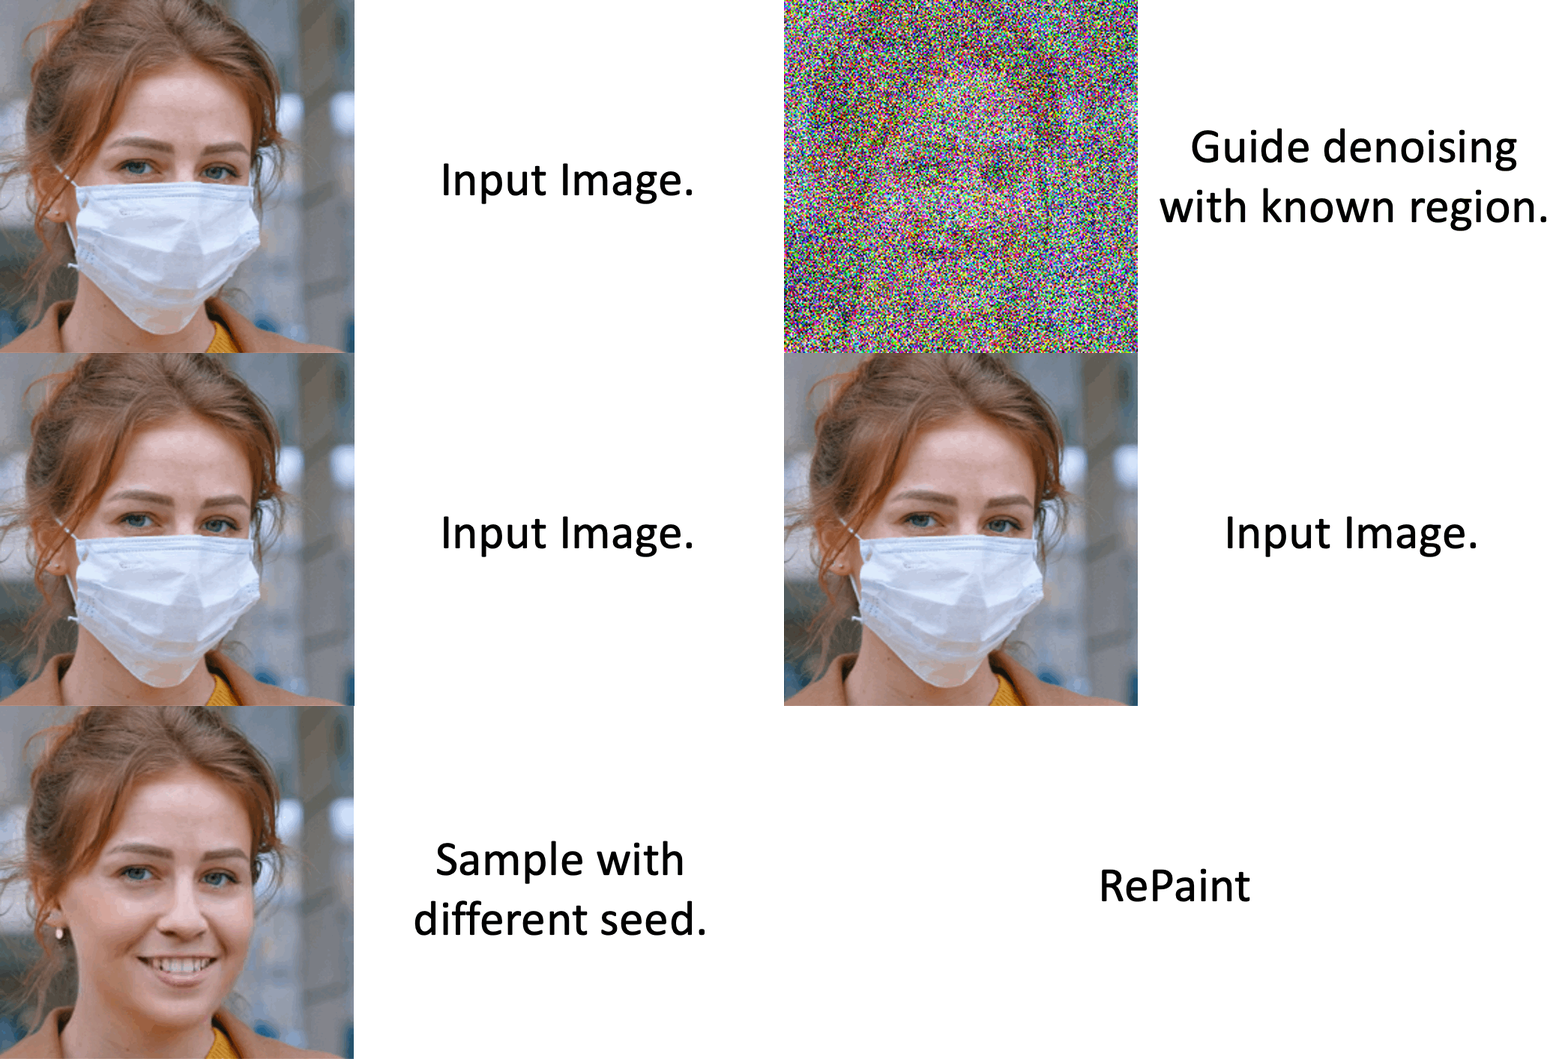
RePaint starts from pure noise. Then the image is denoised step-by-step.
It uses the known part to fill the unknown part in each step.
Why does the noise level fluctuate during generation?
Our noise schedule improves the harmony between the generated and
the known part [4.2 Resampling].
Details on data
Which datasets and masks have a ready-to-use config file?
We provide config files for ImageNet (inet256), CelebA-HQ (c256) and Places2 (p256) for the masks "thin", "thick", "every second line", "super-resolution", "expand" and "half" in ./confs. You can use them as shown in the example above.
How to prepare the test data?
We use LaMa for validation and testing. Follow their instructions and add the images as specified in the config files. When you download the data using download.sh, you can see examples of masks we used.
How to apply it to other images?
Copy the config file for the dataset that matches your data best (for faces aligned like CelebA-HQ _c256, for diverse images _inet256). Then set the gt_path and mask_path to where your input is. The masks have the value 255 for known regions and 0 for unknown areas (the ones that get generated).
How to apply it for other datasets?
If you work with other data than faces, places or general images, train a model using the guided-diffusion repository. Note that RePaint is an inference scheme. We do not train or finetune the diffusion model but condition pre-trained models.
Adapt the code
How to design a new schedule?
Fill in your own parameters in this line to visualize the schedule using python guided_diffusion/scheduler.py. Then copy a config file, set your parameters in these lines and run the inference using python test.py --conf_path confs/my_schedule.yml.
How to speed up the inference?
The following settings are in the schedule_jump_params key in the config files. You can visualize them as described above.
- Reduce
t_T, the total number of steps (without resampling). The lower it is, the more noise gets removed per step. - Reduce
jump_n_sampleto resample fewer times. - Apply resampling not from the beginning but only after a specific time by setting
start_resampling.
Code overview
- Schedule: The list of diffusion times t which will be traversed are obtained in this line. e.g. times = [249, 248, 249, 248, 247, 248, 247, 248, 247, 246, ...]
- Denoise: Reverse diffusion steps from xt (more noise) to a xt-1 (less noisy) are done below this line.
- Predict: The model is called here and obtains xt and the time t to predict a tensor with 6 channels containing information about the mean and variance of xt-1. Then the value range of the variance is adjusted here. The mean of xt-1 is obtained by the weighted sum of the estimated x0 and xt here. The obtained mean and variance is used here to sample xt-1. (This is the original reverse step from guided-diffusion. )
- Condition: The known part of the input image needs to have the same amount of noise as the part that the diffusion model generates to join them. The required amount of noise is calculated here and added to the known part here. The generated and sampled parts get joined using a maks here.
- Undo: The forward diffusion steps from xt-1 to xt is done after this line. The noise gets added to xt-1 here.
Issues
Do you have further questions?
Please open an issue, and we will try to help you.
Did you find a mistake?
Please create a pull request. For examply by clicking the pencil button on the top right on the github page.
RePaint on diverse content and shapes of missing regions
The blue region is unknown and filled by RePaint:
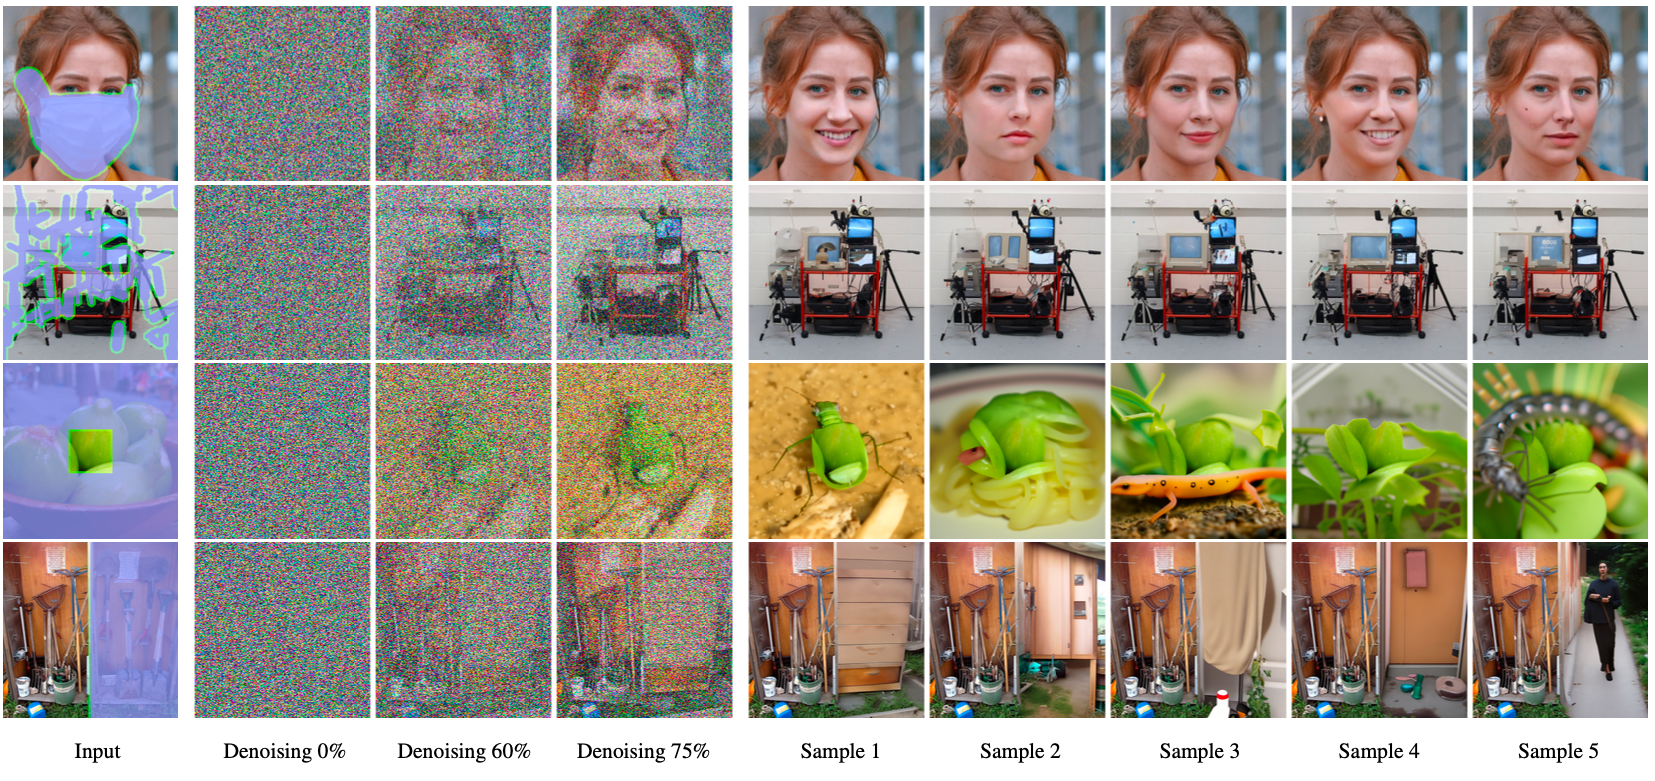
Note: RePaint creates many meaningful fillings.
-
Face: Expressions and features like an earring or a mole.
-
Computer: The computer screen shows different images, text, and even a logo.
-
Greens: RePaint makes sense of the tiny known part and incorporates it in a beetle, spaghetti, and plants.
-
Garden: From simple filling like a curtain to complex filling like a human.
Extreme Case 1: Generate every second line

- Every Second line of the input image is unknown.
- Most inpainting methods fail on such masks.
Extreme Case 2: Upscale an image

- The inpainting only knows pixels with a stridden access of 2.
- A ratio of 3/4 of the image has to be filled.
- This is equivalent to Super-Resolution with the Nearest Neighbor kernel.
RePaint conditions the diffusion model on the known part
- RePaint uses unconditionally trained Denoising Diffusion Probabilistic Models.
- We condition during inference on the given image content.

Intuition of one conditioned denoising step:
- Sample the known part: Add gaussian noise to the known regions of the image.
We obtain a noisy image that follows the denoising process exactly. - Denoise one step: Denoise the previous image for one step. This generates
content for the unknown region conditioned on the known region. - Join: Merge the images from both steps.
Details are in Algorithm 1 on Page 5. [Paper]
How to harmonize the generated with the known part?
- Fail: When using only the algorithm above, the filling is not well harmonized with the known part (n=1).
- Fix: When applying the [4.2 Resampling] technique, the images are better harmonized (n>1).

RePaint Fails
- The ImageNet model is biased towards inpainting dogs.
- This is due to the high ratio of dog images in ImageNet.

User Study State-of-the-Art Comparison
- Outperforms autoregression-based and GAN-based SOTA methods,
with 95% significance for all masks except for two inconclusive cases. - The user study was done for six different masks on three datasets.
- RePaint outperformed SOTA methods in 42 of 44 cases. [Paper]
Explore the Visual Examples
- Datasets: CelebA-HQ, ImageNet, Places2
- Masks: Random strokes, half image, huge, sparse
- Explore more examples like this in the [Appendix].

Acknowledgement
This work was supported by the ETH Zürich Fund (OK), a Huawei Technologies Oy (Finland) project, and an Nvidia GPU grant.
This repository is based on guided-diffuion from OpenAI.