Mesh Avatar Studio
Turn a single illustration into an animated 2D mesh avatar: it blinks, talks, turns its head, breathes and sways its hair. A coding agent prepares the avatar from your image; you fine-tune it in a local editor with a live preview.
See it move on the landing page.
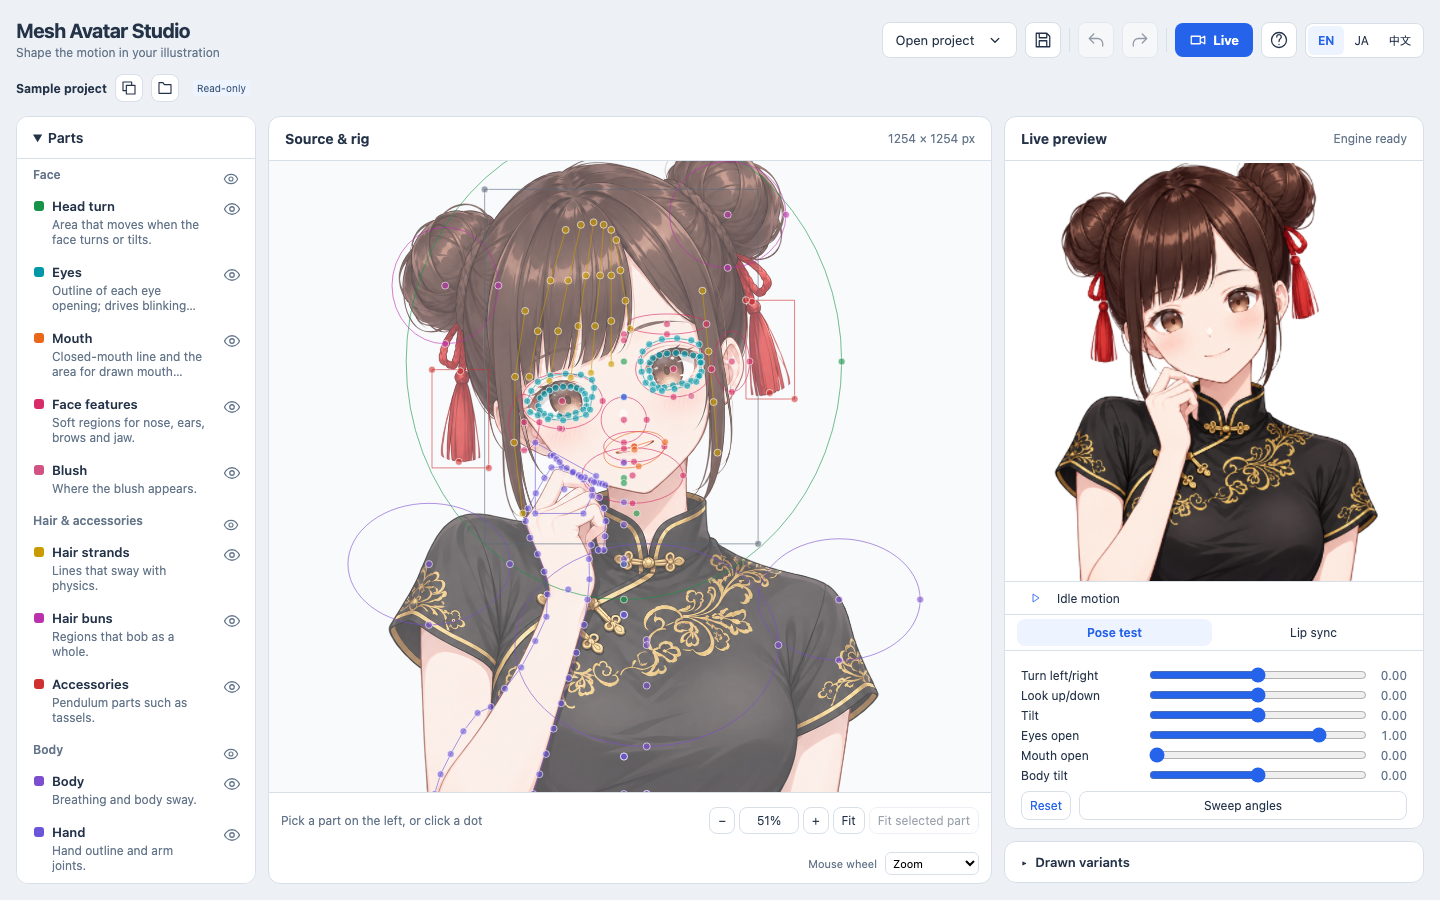
Try the sample
Requires Node.js 22.17+.
npm install
npm run dev
Open the URL printed in the terminal (for example http://127.0.0.1:5173/). The editor opens
the bundled sample, Miko in a qipao. Pick a part on the left, drag its dots on the image and
watch the preview on the right. The sample is read-only; when you change it, choose
Copy and keep editing to continue in your own copy.
Using Windows
Use git clone to download the repository when possible. If you use a ZIP, open its
Properties in File Explorer and select Unblock, if shown, before extracting it.
Create projects/ yourself under your Windows account before asking an agent to work in it.
Folders created by another account or an agent running in a sandbox can have permissions
that prevent the editor from reading them. If a project cannot be read, use the folder's
Properties → Security settings to grant your account access to the whole project,
including its files and subfolders through permission inheritance.
How it works
Making an avatar from your own illustration takes four steps. Steps 1 and 4 are done by a coding agent (Claude Code or Codex) working in this repository; steps 2 and 3 happen in the editor.
1. Ask your agent to create the avatar
Open Claude Code or Codex in this repository folder and give it your illustration:
Create an avatar from this image following docs/agent-guide.md:
/path/to/your-image.png
The agent follows the agent guide: it checks how accurately it reads
coordinates, places the rig on zoomed grids, cuts the image into layers and reviews the
avatar in fixed poses. The project is saved in projects//, which is never committed.
Best results come from a front-facing, head-and-shoulders PNG with a transparent background.
When no project is open, the editor shows this request ready to copy.

Recommended setups:
| Agent | Model |
|---|---|
| Claude Code | Claude Opus 5.5 |
| Codex | GPT-6.1 Sol |
2. Open the project and check it
Start the editor (npm run dev), choose Open project and pick your project from the list.
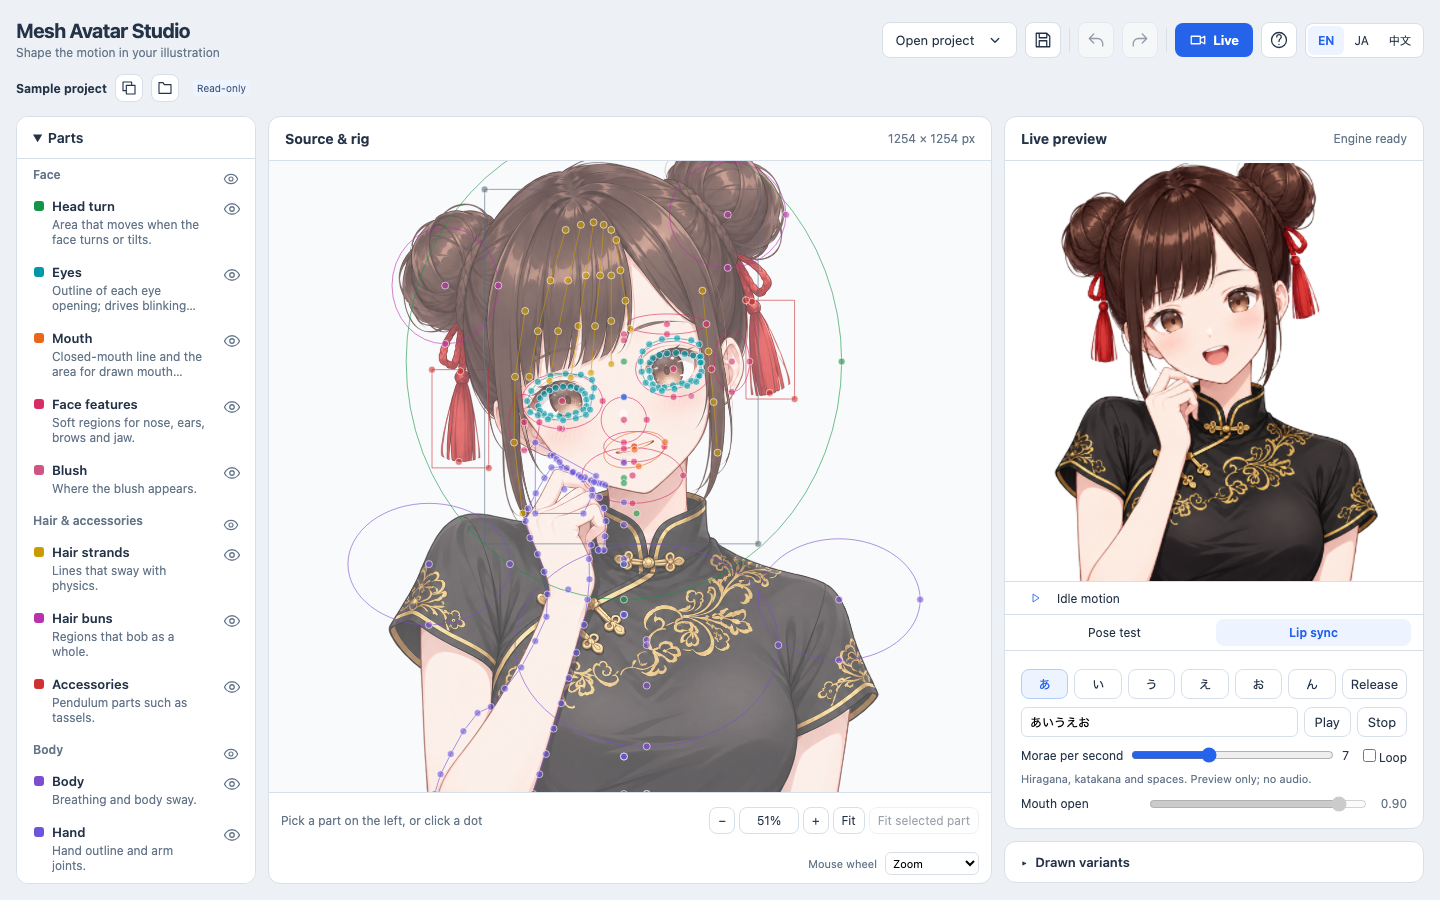
In the preview, use Pose test to turn and tilt the head and close the eyes, and
Lip sync to check the vowel mouth shapes.
3. Fix what looks wrong by dragging
Select a part on the left. Its dots are highlighted on the image; drag them to fix the placement. The preview follows your changes immediately. Some values also decide how the image is cut into layers: eye and hand outlines, and the head, hair and bun areas used for the hair mask. After changing those, a banner appears; choose Save and rebuild layers there. It takes a few seconds.

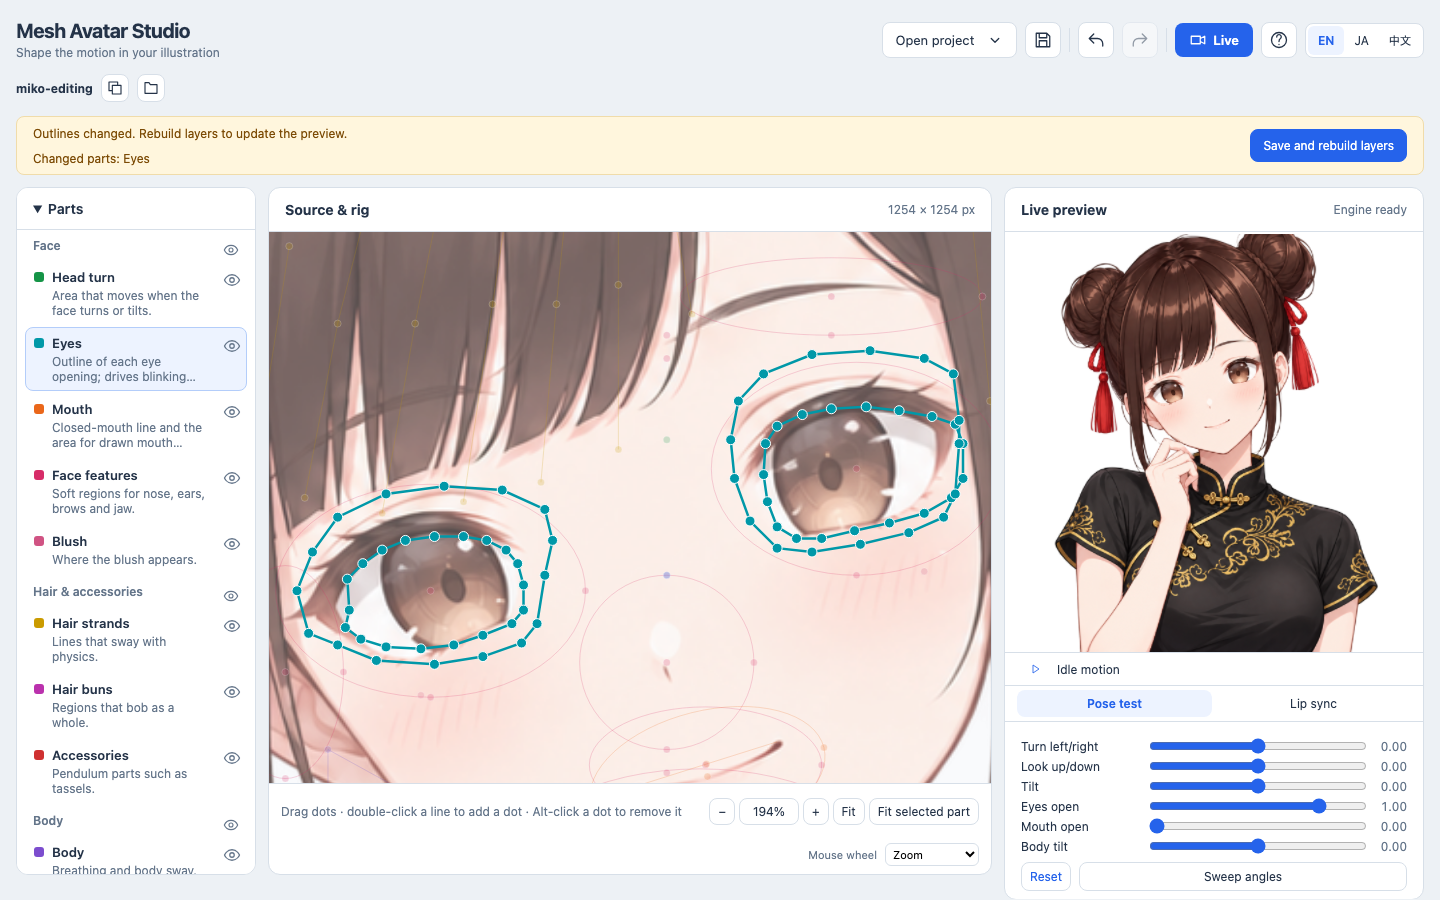
Zoom with a pinch or Ctrl/Cmd+scroll, pan with two fingers or by dragging empty space, and use Fit selected part to jump to the current part.
4. Get drawn eyes and mouths
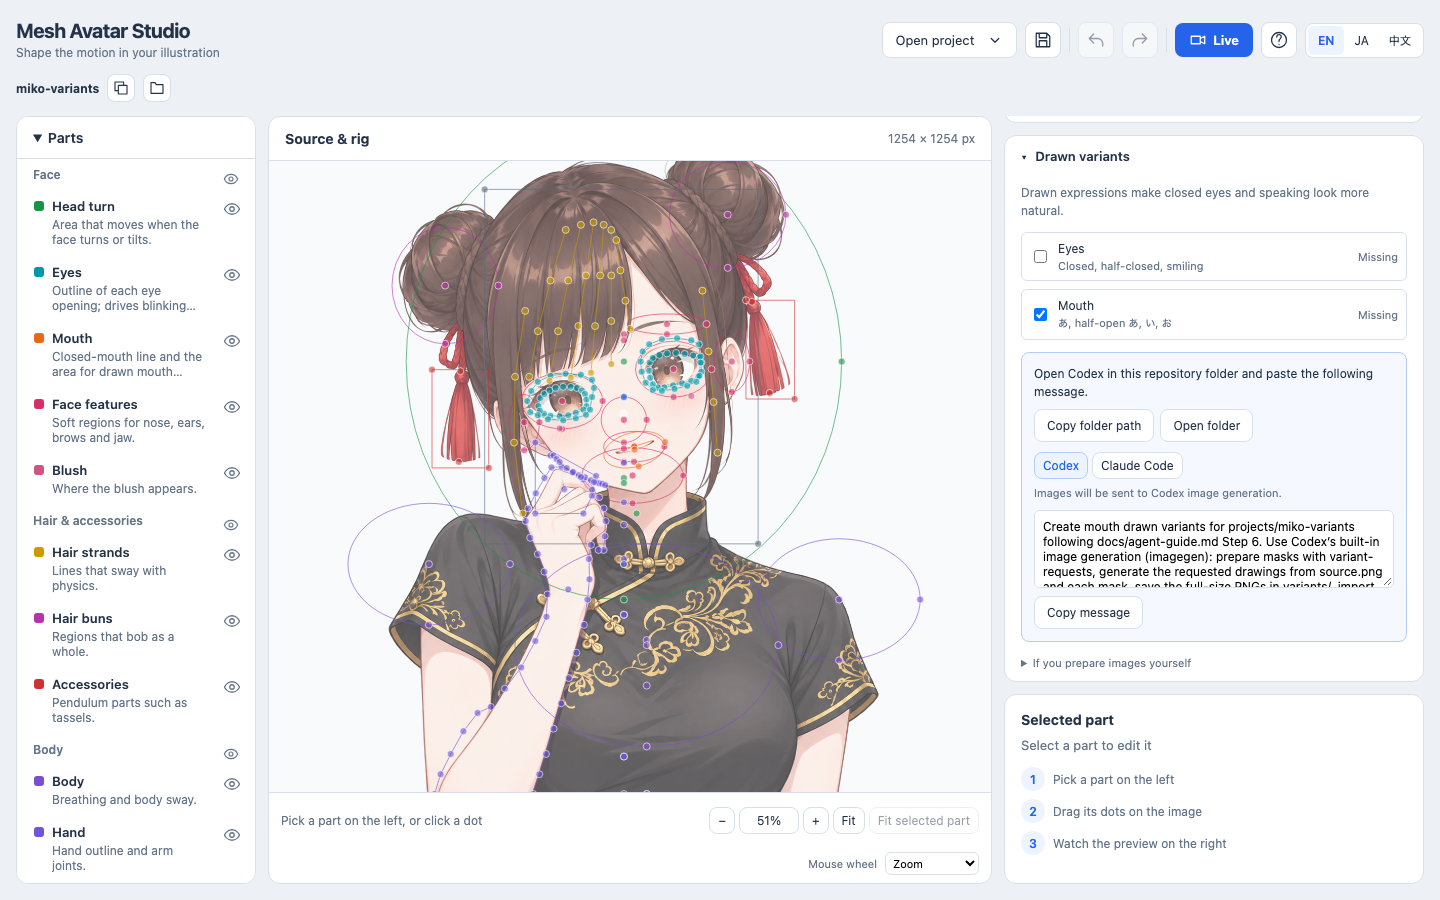
Without drawings, the eyes and mouth move by mesh deformation alone. Drawn closed eyes and vowel mouths make blinking and talking look much more natural. In Drawn variants, check Eyes, Mouth or both, copy the message and paste it into Codex opened in this repository folder. Codex draws them with its built-in image generation and imports them; the editor reloads them automatically. (Claude Code cannot generate images; its message prepares the masks and prompts for you to hand to an image generator.)
Share your avatar
Choose Export .mavatar in the editor to download one file containing the saved rig, built layers, drawn expressions and avatar metadata. Include source image is on by default so the recipient can edit it in Studio. If you have unsaved edits, use Save and export; changed outlines need a layer rebuild first. Read-only views export the original files.
In Open project, choose Import .mavatar or drop the file there. Studio creates a new
folder under projects/, using a new name if one already exists. Import requires npm run dev
and accepts archives up to 128 MiB. Without the source image, the imported avatar can play but
cannot be edited or rebuilt. Omitting the source does not remove the built images.
See the avatar format for the file contents.
Live and streaming
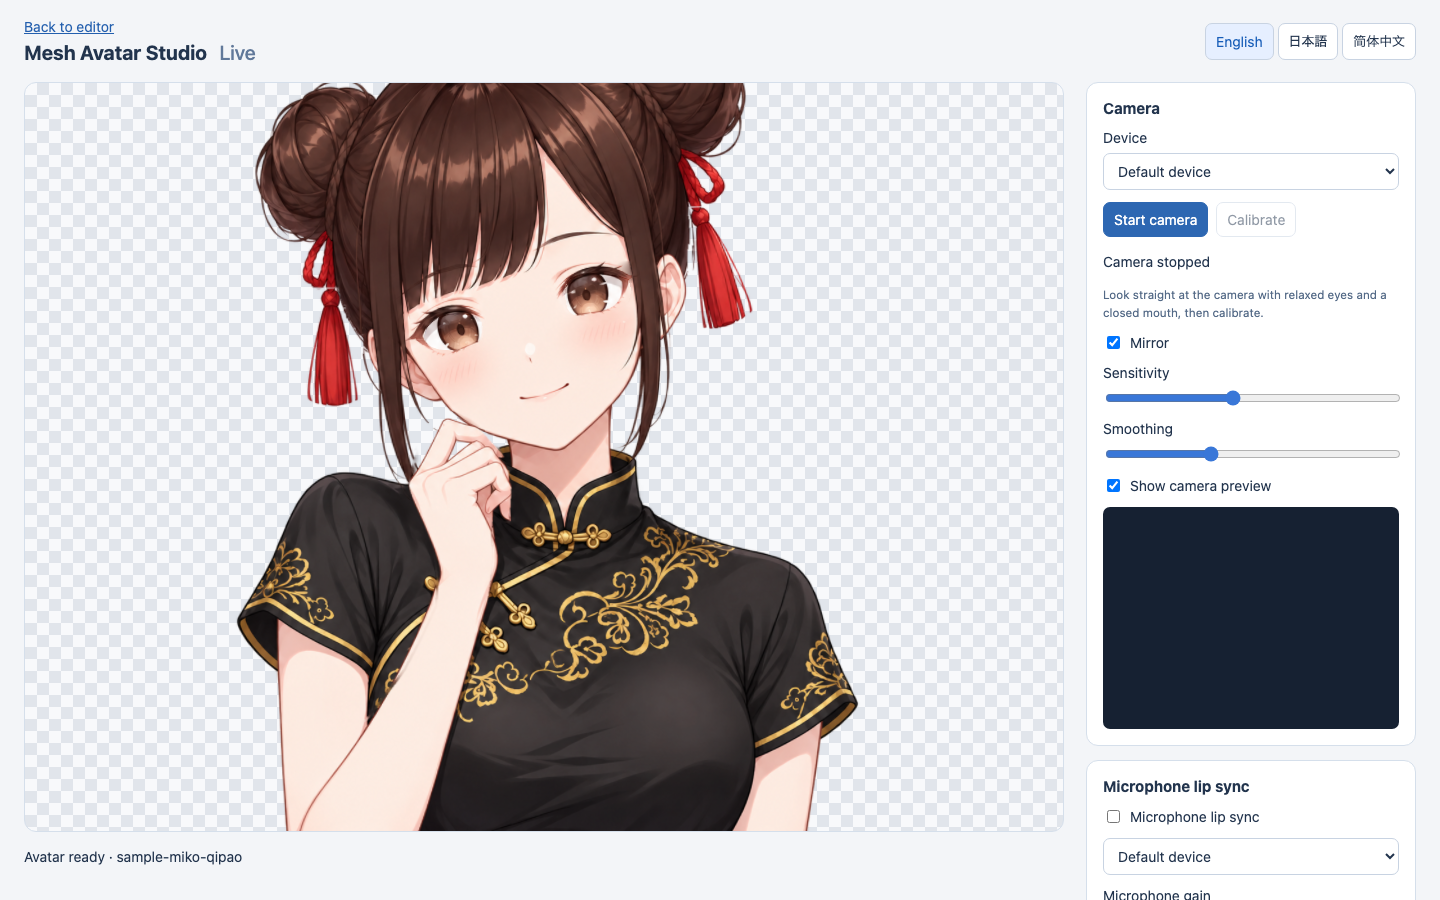
Open your project in the editor and choose Live. Start the camera, face forward with relaxed eyes and a closed mouth, then choose Calibrate. You can adjust mirroring, sensitivity and smoothing, or enable microphone lip sync. Camera video and microphone audio stay on your machine; only numeric avatar motion values reach the stream view.
Choose a background and Copy OBS URL, or Open stream view in a new tab to check it first. Keep the Live page open and add the URL as an
OBS Browser Source, for example at 1080 × 1080. The transparent background works
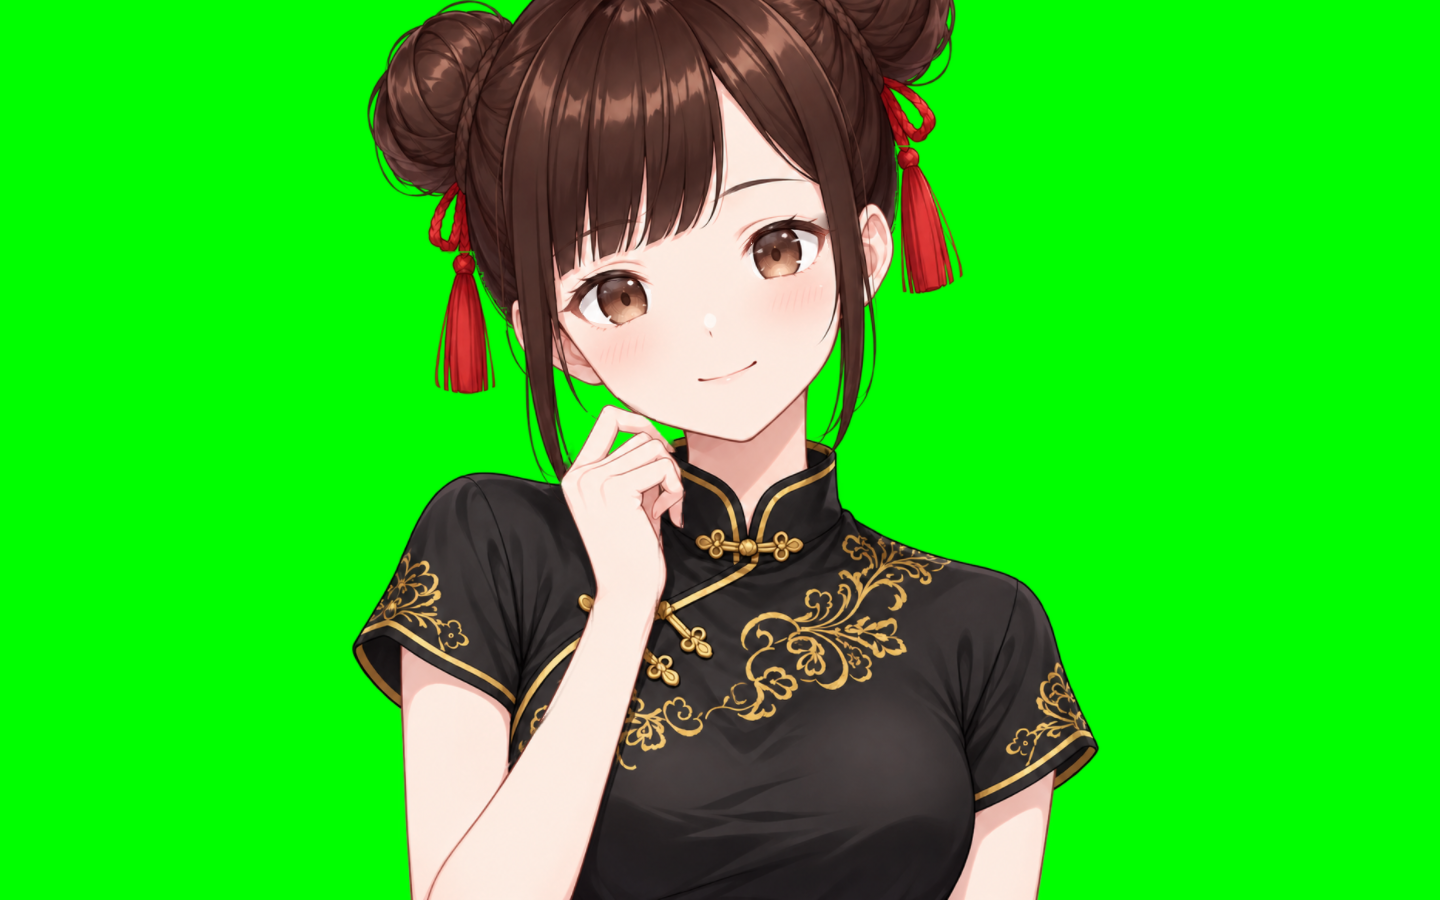
directly in OBS. For other capture software, choose green and apply a chroma key.
Both pages use the local development server (npm run dev). The stream view shows idle
motion when the Live page stops sending updates.
Optional Lighting adds shading that follows a light you drag over the avatar. It is off by default; open its section near the bottom of the Live page, or below the preview in the editor. The OBS URL includes the lighting settings. See Lighting.
Keep the Live page open in its own window. Open the OBS URL inside OBS or in another tab; do not paste it into the tab running Live. If the page reports that tracking has stopped or slowed while hidden, bring its window to the front.
Switch expressions such as a smile, surprise or a wink with the Expression buttons or keys 1–8 while tracking continues. A Stream Deck button or a keyboard shortcut can switch them while another app such as OBS is in front; macOS Shortcuts keys do not work in every app (details).
Save up to eight lighting setups, such as a red light from below for a horror game, as presets, and switch them with Shift+1–8 or the same kind of shortcut (details).
The camera is optional: with only the microphone on, the avatar keeps its idle motion and your voice moves the mouth. To appear as the avatar in Zoom, Google Meet and similar apps, use OBS's Virtual Camera (steps).
Stream view options, troubleshooting and privacy details are in the reference.
Releases
For changes to mesh-avatar, run npm run changeset and include the generated file in your
PR. On main, GitHub Actions opens or updates a chore: version packages PR with the next
version and changelog; merging it publishes mesh-avatar to npm with provenance. The Studio
root package stays private. Publishing uses npm trusted publishing: on npmjs.com, add a trusted publisher for
mesh-avatar that names this repository and the release.yml workflow; no npm token is stored
in the repository. A publish that npm cannot match to a trusted publisher waits in the
Staged Packages tab until a maintainer approves it with 2FA. In repository
Settings → Actions → General, enable Allow GitHub Actions to create and approve pull requests
so the workflow can open version PRs. Run npm run e2e
locally before opening a PR; CI runs the other checks and does not install Playwright browsers.
More
- Agent guide: the step-by-step procedure agents follow
- Reference: projects, building layers by hand, all editor controls, tests
- Rig fields: what every value in
rig.jsonmeans - Avatar format: folder and
.mavatarlayouts, metadata and validation
License
The code is released under the MIT License.
The sample character Miko (samples/miko-qipao/) is not covered by the MIT License. Miko is the
character of AITuber OnAir, © Yuki Shindo (AITuber OnAir), and her images are provided under the
Miko Character Usage Guidelines; see
samples/miko-qipao/MIKO_ASSET_TERMS.md. They may be used
and modified as part of your own works, but not redistributed on their own or as an asset
collection. This project is not an official AITuber OnAir product.
Face tracking uses MediaPipe (@mediapipe/tasks-vision
and the Face Landmarker model in vendor/mediapipe/), © The MediaPipe Authors, licensed under the
Apache License 2.0; see vendor/mediapipe/LICENSE.