Deep White-Balance Editing, CVPR 2020 (Oral)
*Mahmoud Afifi*1,2 and *Michael S. Brown*1
1Samsung AI Center (SAIC) - Toronto
2York University

Reference code for the paper Deep White-Balance Editing. Mahmoud Afifi and Michael S. Brown, CVPR 2020. If you use this code or our dataset, please cite our paper:
@inproceedings{afifi2020deepWB,
  title={Deep White-Balance Editing},
  author={Afifi, Mahmoud and Brown, Michael S},
  booktitle={Proceedings of the IEEE Conference on Computer Vision and Pattern Recognition},
  year={2020}
}

Training data
-
Download the Rendered WB dataset.
-
Copy both input images and ground-truth images in a single directory. Each pair of input/ground truth images should be in the following format: input image:
name_WB_picStyle.pngand the corresponding ground truth image:name_G_AS.png. This is the same filename style used in the Rendered WB dataset. As an example, please refer todatasetdirectory.
Code
We provide source code for Matlab and PyTorch platforms. There is no guarantee that the trained models produce exactly the same results.
1. Matlab (recommended)
Prerequisite
- Matlab 2019b or higher
- Deep Learning Toolbox
Get Started
Run install_.m
Demos:
-
Run
demo_single_image.mordemo_images.mto process a single image or image directory, respectively. The available tasks are AWB, all, and editing. If you run the demo_single_image.m, it should save the result in../result_imagesand output the following figure:
-
Run
demo_GUI.mfor a gui demo.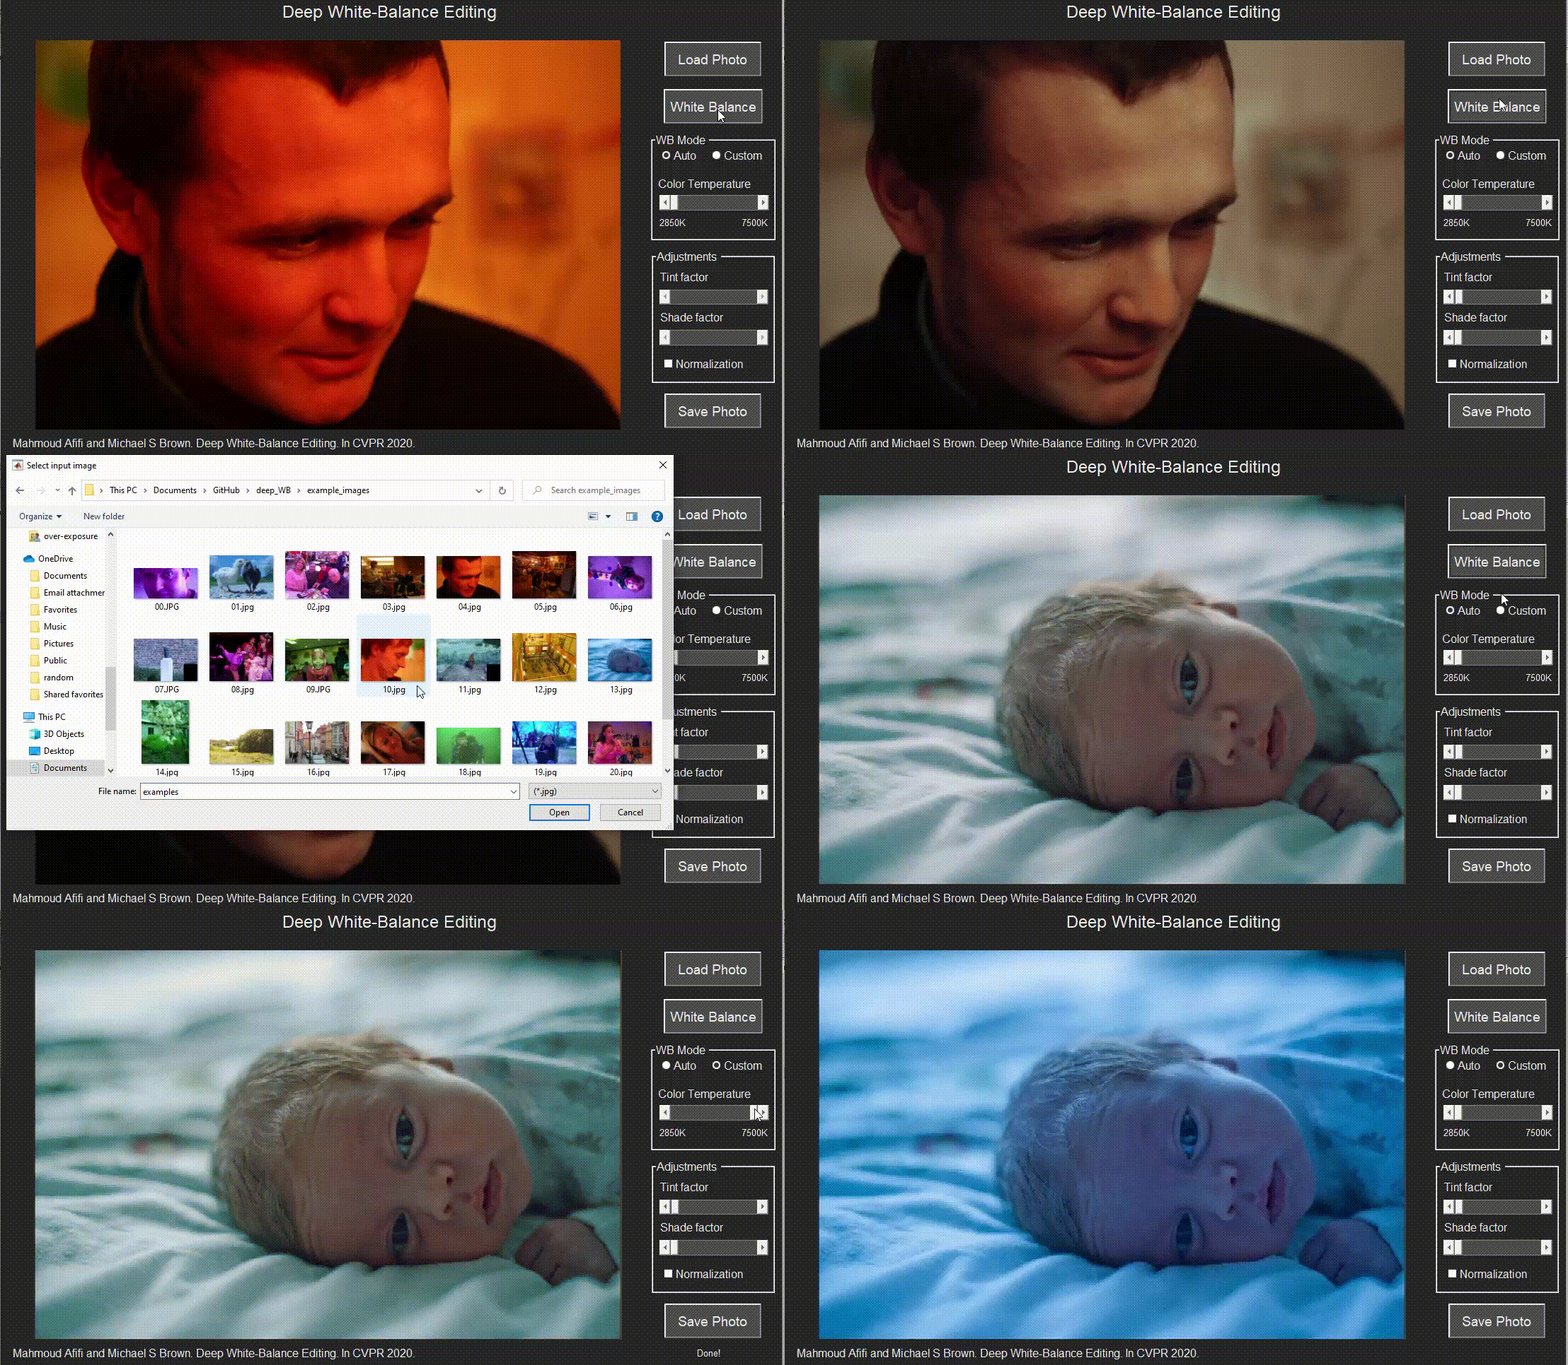
Training Code:
Run training.m to start training. You should adjust training image directories from the datasetDir variable before running the code. You can change the training settings in training.m before training.
For example, you can use epochs and miniBatch variables to change the number of training epochs and mini-batch size, respectively. If you set fold = 0 and trainingImgsNum = 0, the training will use all training data without fold cross-validation. If you would like to limit the number of training images to be n images, set trainingImgsNum to n. If you would like to do 3-fold cross-validation, use fold = testing_fold. Then the code will train on the remaining folds and leave the selected fold for testing.
Other useful options include: patchsPerImg to select the number of random patches per image and patchSize to set the size of training patches. To control the learning rate drop rate and factor, please check the get_training_options.m function located in the utilities directory. You can use the loadpath variable to continue training from a training checkpoint .mat file. To start training from scratch, use loadpath=[];.
Once training started, a .cvs file will be created in the reports_and_checkpoints directory. You can use this file to visualize training progress. If you run Matlab with a graphical interface and you want to visualize some of input/output patches during training, set a breakpoint here and write the following code in the command window:
close all; i = 1; figure; subplot(2,3,1);imshow(extractdata(Y(:,:,1:3,i))); subplot(2,3,2);imshow(extractdata(Y(:,:,4:6,i))); subplot(2,3,3);imshow(extractdata(Y(:,:,7:9,i))); subplot(2,3,4); imshow(gather(T(:,:,1:3,i))); subplot(2,3,5); imshow(gather(T(:,:,4:6,i))); subplot(2,3,6); imshow(gather(T(:,:,7:9,i)));
You can change the value of i in the above code to see different images in the current training batch. The figure will show you produced patches (first row) and the corresponding ground truth patches (second row). For non-graphical interface, you can edit your custom code here to save example patches periodically. Hint: you may need to use a persistent variable to control the process. Alternative solutions include using custom trianing loop.
2. PyTorch
Prerequisite
-
Python 3.6
-
pytorch (tested with 1.2.0 and 1.5.0)
-
torchvision (tested with 0.4.0 and 0.6.0)
-
cudatoolkit
-
tensorboard (optional)
-
numpy
-
Pillow
-
future
-
tqdm
-
matplotlib
-
scipy
-
scikit-learn
The code may work with library versions other than the specified.
Get Started
Demos:
-
Run
demo_single_image.pyto process a single image. Example of applying AWB + different WB settings:python demo_single_image.py --input_image ../example_images/00.jpg --output_image ../result_images --show. This example should save the output image in../result_imagesand output the following figure:
-
Run
demo_images.pyto process image directory. Example:python demo_images.py --input_dir ../example_images/ --output_dir ../result_images --task AWB. The available tasks are AWB, all, and editing. You can also specify the task in thedemo_single_image.pydemo.
Training Code:
Run training.py to start training. You should adjust training image directories before running the code.
Example: CUDA_VISIBLE_DEVICE=0 python train.py --training_dir ../dataset/ --fold 0 --epochs 500 --learning-rate-drop-period 50 --num_training_images 0. In this example, fold = 0 and num_training_images = 0 mean that the training will use all training data without fold cross-validation. If you would like to limit the number of training images to be n images, set num_training_images to n. If you would like to do 3-fold cross-validation, use fold = testing_fold. Then the code will train on the remaining folds and leave the selected fold for testing.
Other useful options include: --patches-per-image to select the number of random patches per image, --learning-rate-drop-period and --learning-rate-drop-factor to control the learning rate drop period and factor, respectively, and --patch-size to set the size of training patches. You can continue training from a training checkpoint .pth file using --load option.
If you have TensorBoard installed on your machine, run tensorboard --logdir ./runs after start training to check training progress and visualize samples of input/output patches.
Results
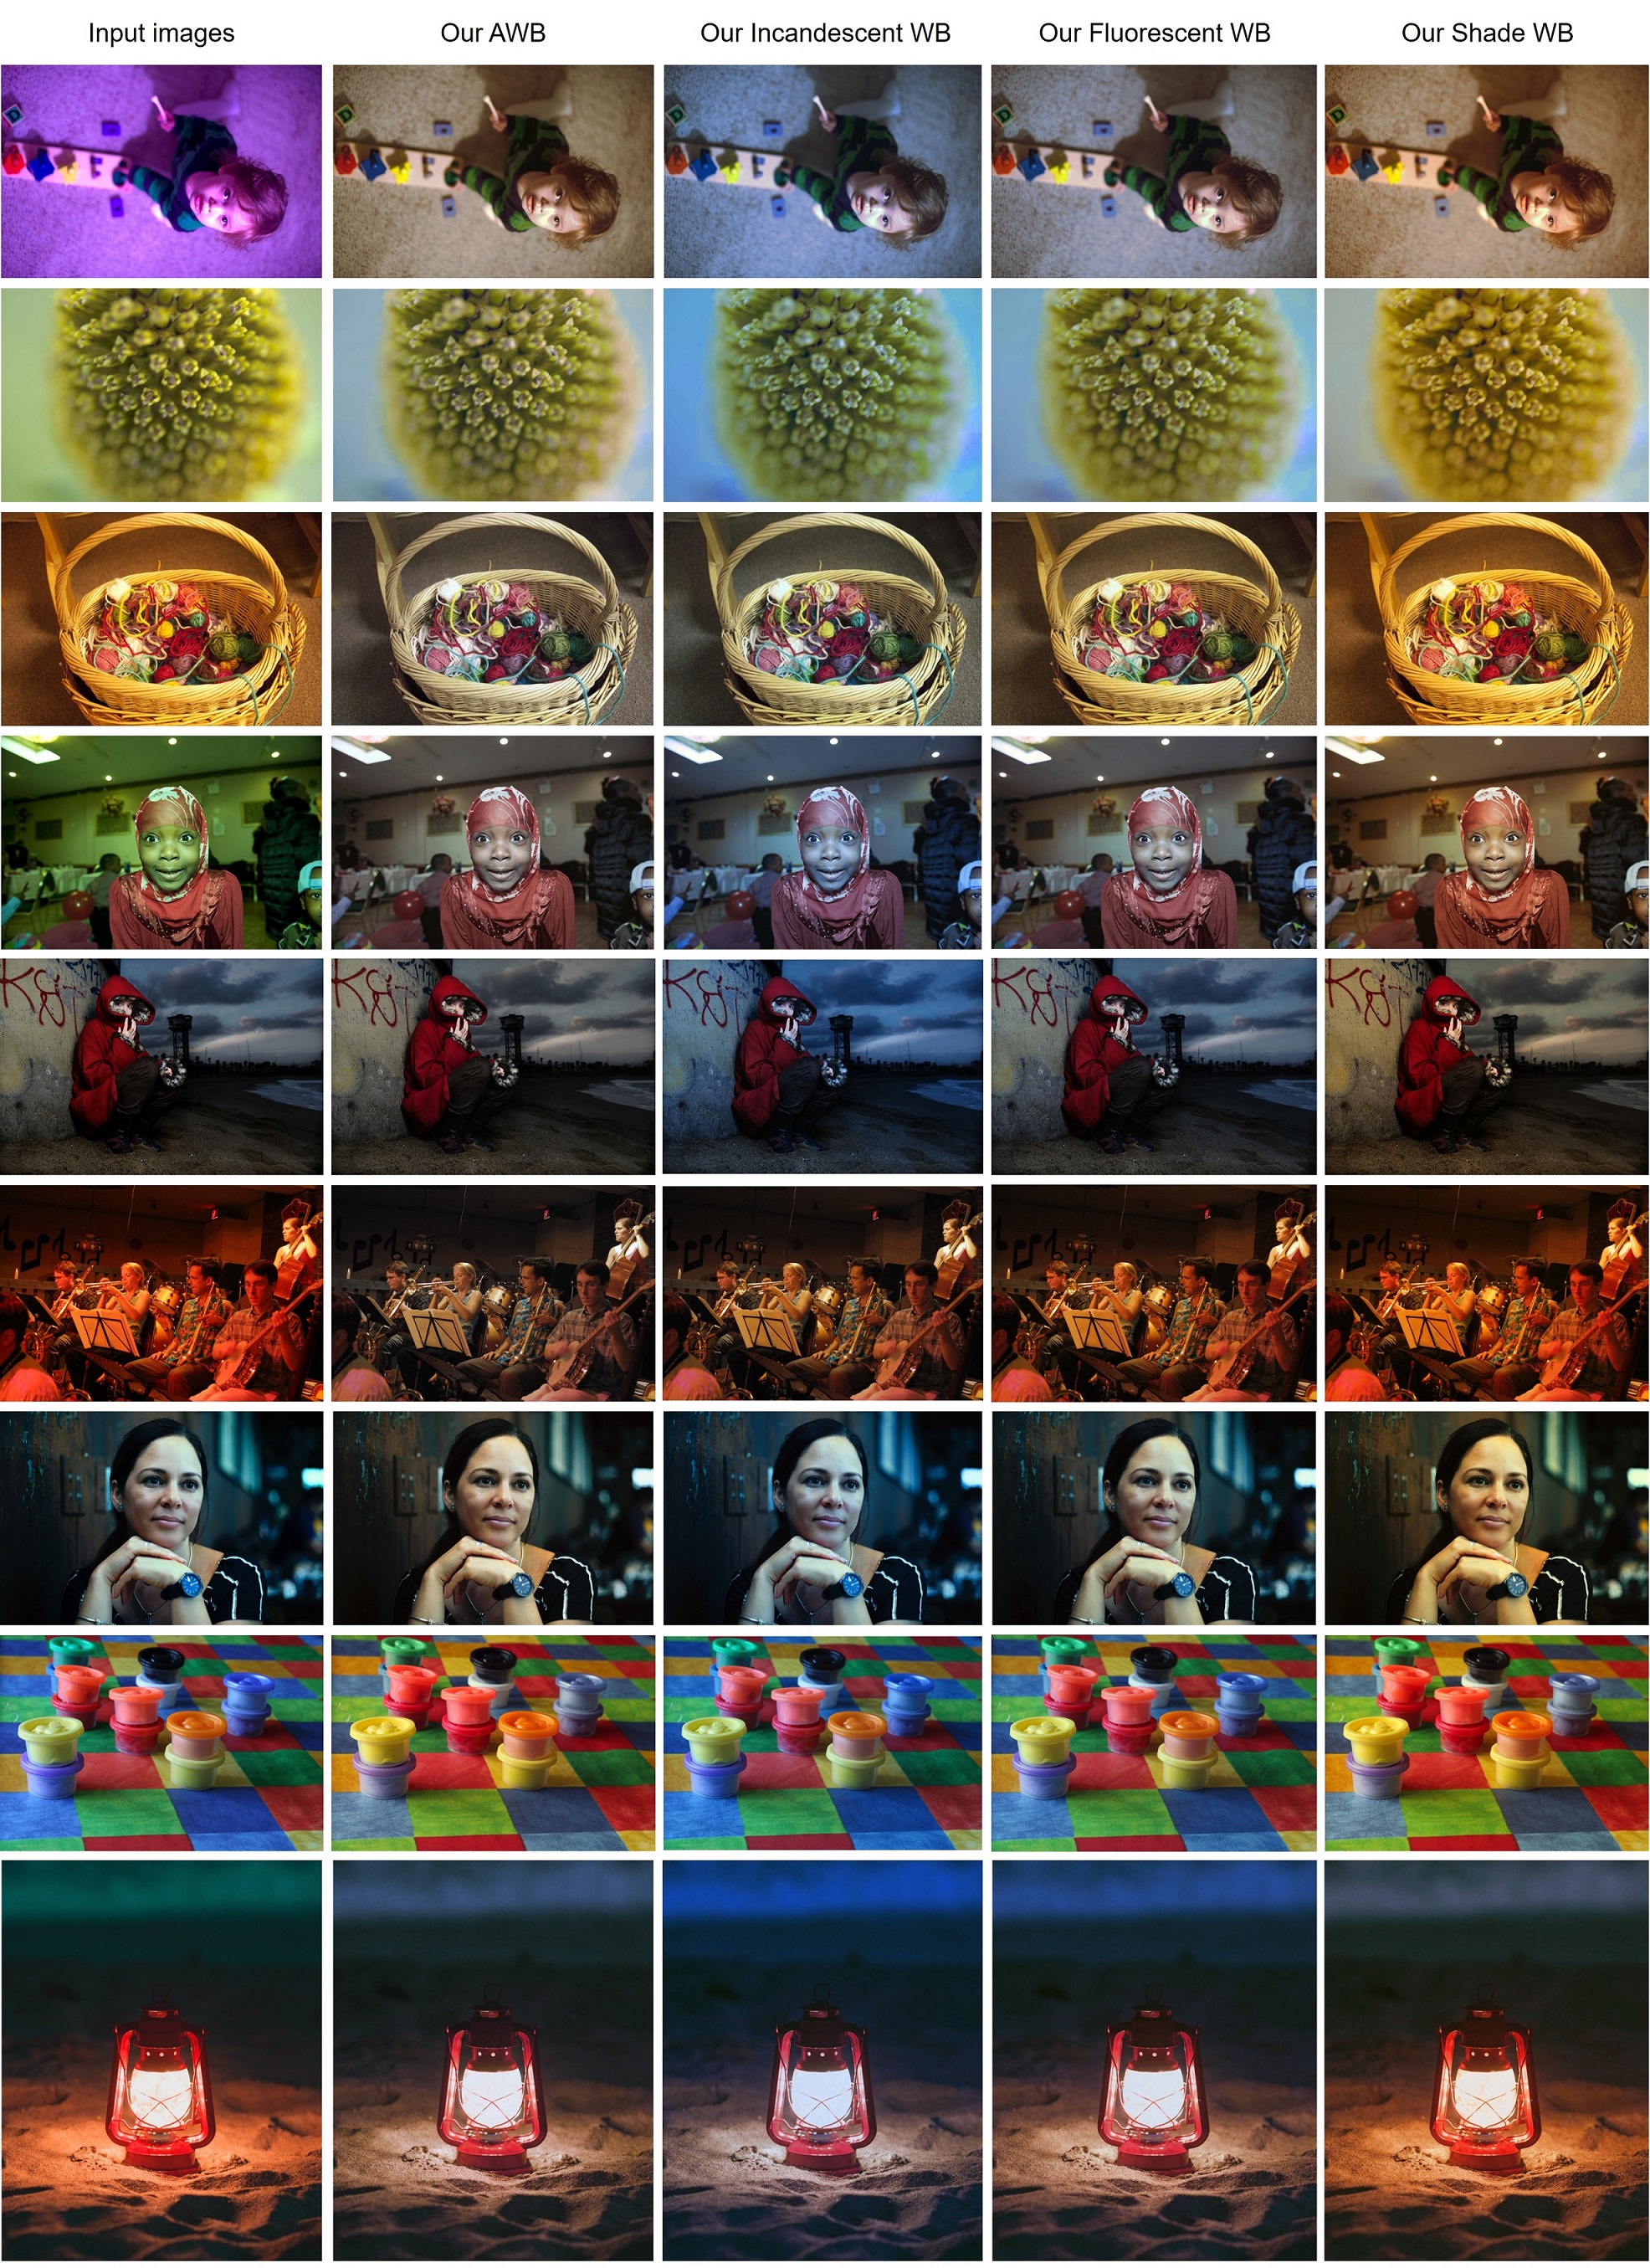
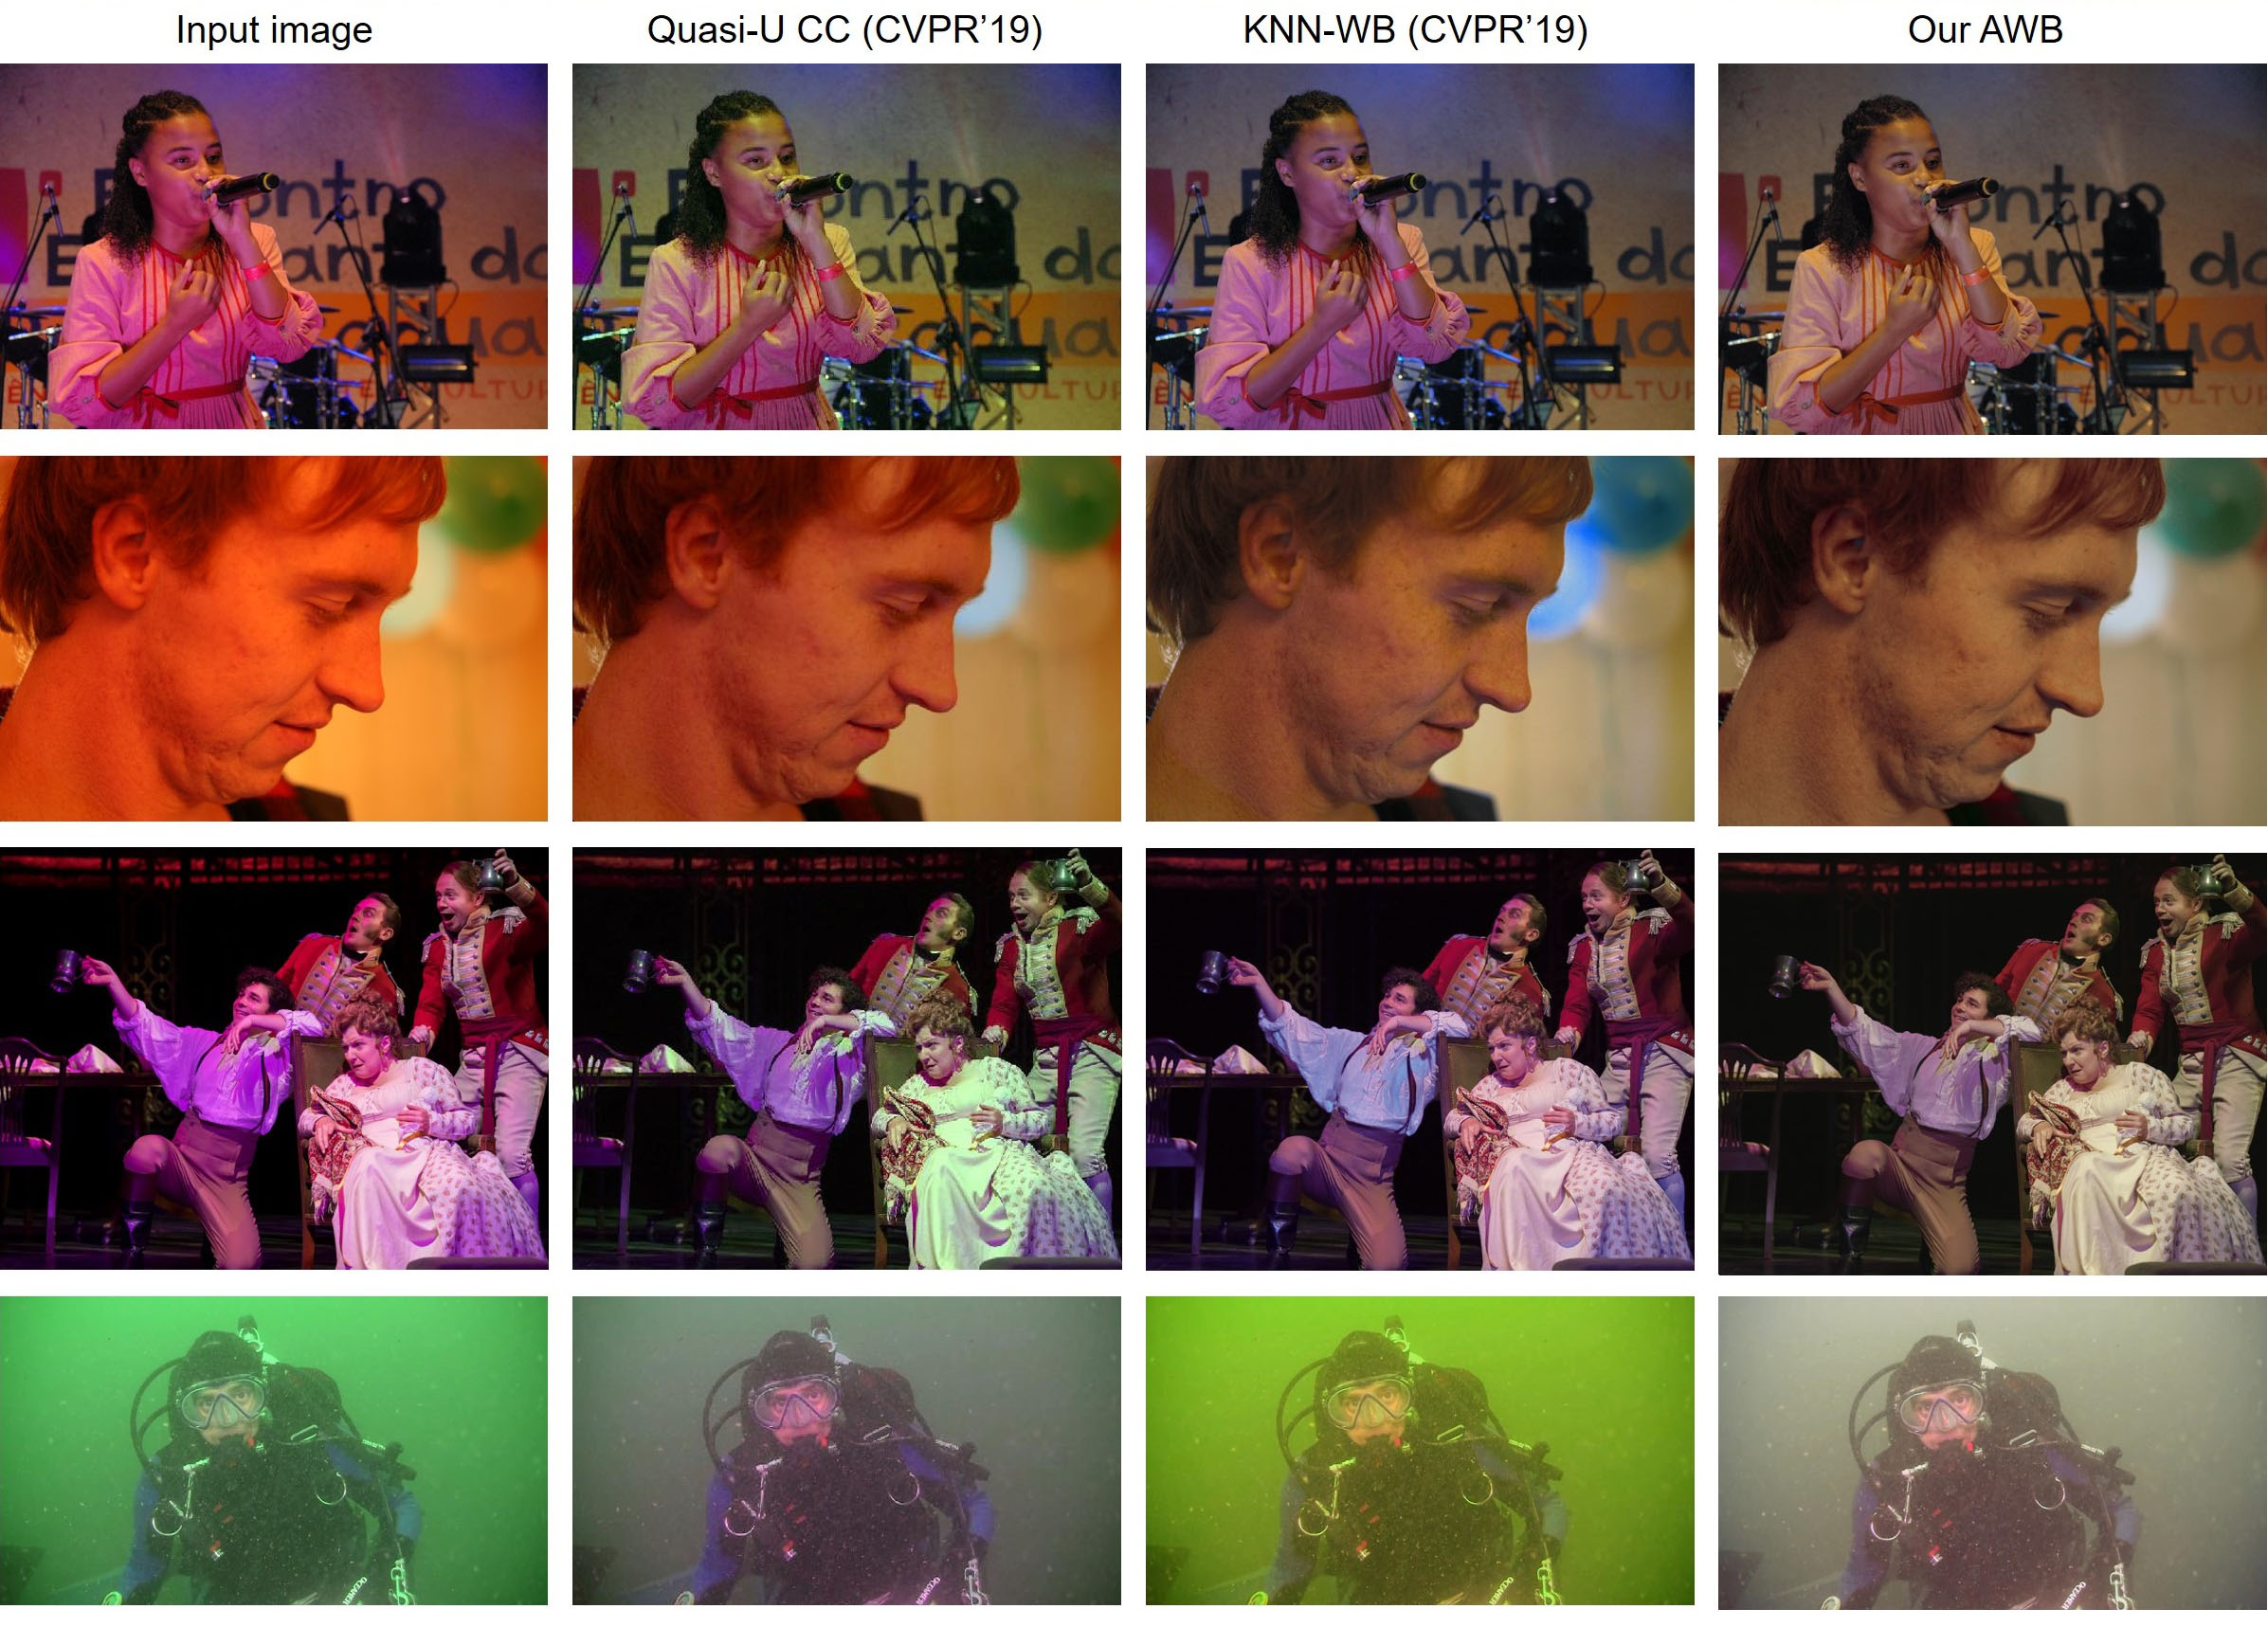

This software is provided for research purposes only and CAN NOT be used for commercial purposes.
Maintainer: Mahmoud Afifi (m.3afifi@gmail.com)
Related Research Projects
- When Color Constancy Goes Wrong: The first work to directly address the problem of incorrectly white-balanced images; requires a small memory overhead and it is fast (CVPR 2019).
- White-Balance Augmenter: An augmentation technique based on camera WB errors (ICCV 2019).
- Interactive White Balancing:A simple method to link the nonlinear white-balance correction to the user's selected colors to allow interactive white-balance manipulation (CIC 2020).
- Exposure Correction: A single coarse-to-fine deep learning model with adversarial training to correct both over- and under-exposed photographs (CVPR 2021).