Porcupine

Made in Vancouver, Canada by Picovoice
Porcupine is a highly-accurate and lightweight wake word engine. It enables building always-listening voice-enabled applications. It is
- using deep neural networks trained in real-world environments.
- compact and computationally-efficient. It is perfect for IoT.
- cross-platform:
- Arm Cortex-M, STM32, and Arduino
- Raspberry Pi (Zero, 3, 4, 5)
- Android and iOS
- Chrome, Safari, Firefox, and Edge
- Linux (x86_64), macOS (x86_64, arm64), and Windows (x86_64, arm64)
- scalable. It can detect multiple always-listening voice commands with no added runtime footprint.
- self-service. Developers can train custom wake word models using Picovoice Console.
Table of Contents
- Porcupine
Use Cases
Porcupine is the right product if you need to detect one or a few static (always-listening) voice commands.
- If you want to create voice experiences similar to Alexa or Google, see the Picovoice platform.
- If you need to understand complex and naturally-spoken voice commands within a specific domain, see the Rhino Speech-to-Intent engine.
Try It Out
-
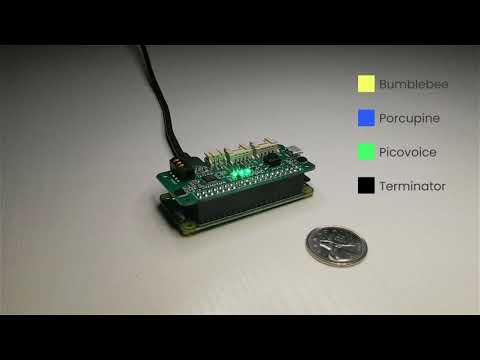
Porcupine on a Raspberry Pi Zero
Language Support
- English, Chinese (Mandarin), French, German, Italian, Japanese, Korean, Portuguese, and Spanish.
- Support for additional languages is available for commercial customers on a case-by-case basis.
Performance
A comparison between accuracy and runtime metrics of Porcupine and two other widely-used libraries, PocketSphinx and Snowboy, is provided here. Compared to the best-performing engine of these two, Porcupine is 11.0 times more accurate and 6.5 times faster (on Raspberry Pi 3).
Demos
If using SSH, clone the repository with:
git clone --recurse-submodules git@github.com:Picovoice/porcupine.git
If using HTTPS, clone the repository with:
git clone --recurse-submodules https://github.com/Picovoice/porcupine.git
Python Demos
Install the demo package:
sudo pip3 install pvporcupinedemo
With a working microphone connected to your device run the following in the terminal:
porcupine_demo_mic --access_key ${ACCESS_KEY} --keywords porcupine
The engine starts processing the audio input from the microphone in realtime and outputs to the terminal when it detects
utterances of Porcupine.
For more information about Python demos go to demo/python.
.NET Demos
From demo/dotnet/PorcupineDemo run the following in the terminal to build the demo:
dotnet build -c MicDemo.Release
Make sure there is a working microphone connected to your device. From demo/dotnet/PorcupineDemo run the following in the terminal:
dotnet run -c MicDemo.Release -- \
--access_key ${ACCESS_KEY} \
--keywords porcupine
The engine starts processing the audio input from the microphone in realtime and outputs to the terminal when it detects
utterances of Porcupine.
For more information about .NET demos go to demo/dotnet.
Java Demos
Make sure there is a working microphone connected to your device. Then invoke the following commands from the terminal:
cd demo/java
./gradlew build
cd build/libs
java -jar porcupine-mic-demo.jar -a ${ACCESS_KEY} -k porcupine
The engine starts processing the audio input from the microphone in realtime and outputs to the terminal when it detects
utterances of Porcupine.
For more information about Java demos go to demo/java.
Flutter Demos
To run the Porcupine demo on Android or iOS with Flutter, you must have the Flutter SDK installed on your system. Once installed, you can run flutter doctor to determine any other missing requirements for your relevant platform. Once your environment has been set up, launch a simulator or connect an Android/iOS device.
Run the prepare_demo script from demo/flutter with a language code to set up the demo in the language of your
choice (e.g. de -> German, ko -> Korean). To see a list of available languages, run prepare_demo without a language code.
dart scripts/prepare_demo.dart ${LANGUAGE}
Replace your AccessKey in lib/main.dart file:
final String accessKey = "{YOUR_ACCESS_KEY_HERE}"; // AccessKey obtained from Picovoice Console (https://console.picovoice.ai/)
Run the following command from demo/flutter to build and deploy the demo to your device:
flutter run
React Native Demos
To run the React Native Porcupine demo app you will first need to set up your React Native environment. For this, please refer to React Native's documentation.
Replace your AccessKey, in App.tsx file:
_accessKey: string ="${YOUR_ACCESS_KEY_HERE}" // AccessKey obtained from Picovoice Console (https://console.picovoice.ai/)
Navigate to demo/react-native/PorcupineDemo to run the following commands:
For Android:
yarn android-install          # sets up environment
yarn android-run ${LANGUAGE}  # builds and deploys to Android
For iOS:
yarn ios-install              # sets up environment
yarn ios-run ${LANGUAGE}      # builds and deploys to iOS
Replace ${LANGUAGE} with the language code of your choice (e.g. de -> German, ko -> Korean).
To see a list of available languages, run the android-run or ios-run command without a language code.
Android Demos
Using Android Studio, open
demo/android/Activity as an Android project, copy your AccessKey into MainActivity.java, select the build variant (Build > Select Build Variant...) for the desired language and then run the application.
To learn about how to use Porcupine in long-running services go to demo/android/Service.
To learn about how to use Porcupine with Android Speech to Text recognition go to demo/android/STT.
iOS Demos
The BackgroundService demo runs audio recording in the background, enabling detection of wake word while the application is not in focus and remains running in the background. The ForegroundApp demo runs wake word detection only when the application is in focus.
BackgroundService Demo
-
To run the demo, go to demo/ios/BackgroundService.
-
Open the
BackgroundService.xcodeprojin XCode -
Replace
let accessKey = "${YOUR_ACCESS_KEY_HERE}"in the file ViewModel.swift with yourAccessKey. -
Run the demo with a simulator or connected iOS device
ForegroundApp Demo
To run the foreground application demo:
-
Go to demo/ios/ForegroundApp directory.
-
Open the
ForegroundApp.xcodeprojin XCode -
Replace
let accessKey = "${YOUR_ACCESS_KEY_HERE}"in the file ViewModel.swift with yourAccessKey. -
Go to
Product > Schemeand select the scheme for the language you would like to demo (e.g.esDemo-> Spanish Demo,deDemo-> German Demo) -
Run the demo with a simulator or connected iOS device
The demo allows you to select any of the pre-built keywords for detection. Press start and say the selected keyword.
Web Demos
Vanilla JavaScript and HTML
From demo/web run the following in the terminal:
yarn
yarn start ${LANGUAGE}
(or)
npm install
npm run start ${LANGUAGE}
Open http://localhost:5000 in your browser to try the demo.
React Demos
From demo/react run the following in the terminal:
yarn
yarn start ${LANGUAGE}
(or)
npm install
npm run start ${LANGUAGE}
Open http://localhost:3000 in your browser to try the demo.
NodeJS Demos
Install the demo package:
yarn global add @picovoice/porcupine-node-demo
With a working microphone connected to your device run the following in the terminal:
ppn-mic-demo --access_key ${ACCESS_KEY} --keywords porcupine
The engine starts processing the audio input from the microphone in realtime and outputs to the terminal when it detects
utterances of Porcupine.
For more information about NodeJS demos go to demo/nodejs.
C Demos
The C demo requires CMake version 3.4 or higher.
The Microphone demo requires miniaudio for accessing microphone audio data.
Windows Requires MinGW to build the demo.
Microphone Demo
At the root of the repository, build with:
cmake -S demo/c/. -B demo/c/build && cmake --build demo/c/build --target porcupine_demo_mic
Linux (x86_64), macOS (x86_64, arm64), and Raspberry Pi (Zero, 3, 4, 5)
List input audio devices with:
./demo/c/build/porcupine_demo_mic --show_audio_devices
Run the demo using:
./demo/c/build/porcupine_demo_mic -l ${LIBRARY_PATH} -m lib/common/porcupine_params.pv \
-k resources/keyword_files/${PLATFORM}/porcupine_${PLATFORM}.ppn -t 0.5 \
-d ${AUDIO_DEVICE_INDEX} -a ${ACCESS_KEY}
Replace ${LIBRARY_PATH} with path to appropriate library available under lib, ${PLATFORM} with the
name of the platform you are running on (linux, raspberry-pi, or mac), ${AUDIO_DEVICE_INDEX} with
the index of your audio device and ${ACCESS_KEY} with your AccessKey.
Windows
List input audio devices with:
.\\demo\\c\\build\\porcupine_demo_mic.exe --show_audio_devices
Run the demo using:
.\\demo\\c\\build\\porcupine_demo_mic.exe ^
-l lib/windows/amd64/libpv_porcupine.dll ^
-m lib/common/porcupine_params.pv ^
-k resources/keyword_files/windows/porcupine_windows.ppn ^
-t 0.5 ^
-d ${AUDIO_DEVICE_INDEX} ^
-a ${ACCESS_KEY}
Replace ${AUDIO_DEVICE_INDEX} with the index of your audio device and ${ACCESS_KEY} with your AccessKey.
The demo opens an audio stream and detects utterances of Porcupine.
File Demo
At the root of the repository, build with:
cmake -S demo/c/. -B demo/c/build && cmake --build demo/c/build --target porcupine_demo_file
Linux (x86_64), macOS (x86_64, arm64), and Raspberry Pi (Zero, 3, 4, 5)
Run the demo using:
./demo/c/build/porcupine_demo_file -l ${LIBRARY_PATH} -m lib/common/porcupine_params.pv \
-k resources/keyword_files/${PLATFORM}/porcupine_${PLATFORM}.ppn -t 0.5 \
-w resources/audio_samples/multiple_keywords.wav -a ${ACCESS_KEY}
Replace ${LIBRARY_PATH} with path to appropriate library available under lib, ${PLATFORM} with the
name of the platform you are running on (linux, raspberry-pi, or mac) and ${ACCESS_KEY} with your AccessKey.
Windows
Run the demo using:
.\\demo\\c\\build\\porcupine_demo_file.exe ^
-l lib/windows/amd64/libpv_porcupine.dll ^
-m lib/common/porcupine_params.pv ^
-k resources/keyword_files/windows/porcupine_windows.ppn ^
-t 0.5 ^
-w resources/audio_samples/multiple_keywords.wav ^
-a ${ACCESS_KEY}
Replace ${ACCESS_KEY} with your AccessKey.
The demo opens up the file and detects utterances of Porcupine.
For more information about C demos go to demo/c.
Microcontroller Demos
There are several projects for various development boards inside the mcu demo folder.
SDKs
Python
Install the Python SDK:
pip3 install pvporcupine
The SDK exposes a factory method to create instances of the engine:
import pvporcupine

# AccessKey obtained from Picovoice Console (https://console.picovoice.ai/)
access_key = "${ACCESS_KEY}"

handle = pvporcupine.create(access_key=access_key, keywords=['picovoice', 'bumblebee'])
keywords argument is a shorthand for accessing default keyword files shipped with the library. The default keyword
files available can be retrieved via
import pvporcupine

print(pvporcupine.KEYWORDS)
If you wish to use a non-default keyword file you need to identify its path:
import pvporcupine

# AccessKey obtained from Picovoice Console (https://console.picovoice.ai/)
access_key = "${ACCESS_KEY}"

handle = pvporcupine.create(
    access_key=access_key,
    keyword_paths=['path/to/non/default/keyword/file'])
When initialized, valid sample rate can be obtained using handle.sample_rate. The required frame length
(number of audio samples in an input array) is handle.frame_length. The object can be used to monitor
incoming audio as follows:
import pvporcupine

# AccessKey obtained from Picovoice Console (https://console.picovoice.ai/)
access_key = "${ACCESS_KEY}"

handle = pvporcupine.create(access_key=access_key, keywords=['porcupine'])

def get_next_audio_frame():
    pass

while True:
    keyword_index = handle.process(get_next_audio_frame())
    if keyword_index >= 0:
        # Insert detection event callback here
        pass
Finally, when done be sure to explicitly release the resources using handle.delete().
.NET
Install the .NET SDK using NuGet or the dotnet CLI:
dotnet add package Porcupine
The SDK exposes a factory method to create instances of the engine:
using Pv;

const string accessKey = "${ACCESS_KEY}";
var keyword = new List { BuiltInKeyword.PICOVOICE };

Porcupine handle = Porcupine.FromBuiltInKeywords(accessKey, keyword);
Using the FromBuiltInKeywords constructor allows you to initialize the Porcupine engine to detect any of the free, built-in keywords that come with the library. These built-ins are represented by the BuiltInKeyword enum.
If you wish to use a custom keyword file (i.e. a keyword file generated by Picovoice Console, with a .ppn extension), you need to specify its path:
const string accessKey = "${ACCESS_KEY}";
var keywordPaths = new List {
    "/absolute/path/to/keyword/one",
    "/absolute/path/to/keyword/two",
    ... }

Porcupine handle = Porcupine.FromKeywordPaths(accessKey, keywordPaths);
When initialized, the required sample rate can be obtained using handle.SampleRate. Expected frame length
(number of audio samples in an input array) is handle.FrameLength. The object can be used to monitor
incoming audio as below:
short[] getNextAudioFrame()
{
    // .. get a frame of audio
    return audioFrame;
}

while(true)
{
    var keywordIndex = handle.Process(getNextAudioFrame())
    if(keywordIndex >= 0)
    {
        // .. Insert detection event callback here
    }
}
Porcupine will have its resources freed by the garbage collector, but to have resources freed immediately after use,
wrap it in a using statement:
using(Porcupine handle = Porcupine.FromBuiltInKeywords(
    accessKey,
    new List { BuiltInKeyword.PICOVOICE }))
{
    // .. Porcupine usage here
}
Java
The Porcupine Java binding is available from the Maven Central Repository at ai.picovoice:porcupine-java:${version}.
import ai.picovoice.porcupine.*;

// AccessKey obtained from Picovoice Console (https://console.picovoice.ai/)
final String accessKey = "${ACCESS_KEY}";
try {
    Porcupine handle = new Porcupine.Builder()
                        .setAccessKey(accessKey)
                        .setBuiltInKeyword(BuiltInKeyword.PORCUPINE)
                        .build();
} catch (PorcupineException e) { }
The setBuiltInKeyword() builder argument is a shorthand for accessing built-in keyword model files shipped with the package.
The list of built-in keywords can be found in the BuiltInKeyword enum, and can be retrieved by:
import ai.picovoice.porcupine.*;

for(BuiltInKeyword keyword : BuiltInKeyword.values()) {
    System.out.println(keyword.name());
}
If you wish to use a custom keyword file (i.e. a keyword file generated by Picovoice Console, with a .ppn extension) you need to the file path as demonstrated below:
import ai.picovoice.porcupine.*;

// AccessKey obtained from Picovoice Console (https://console.picovoice.ai/)
final String accessKey = "${ACCESS_KEY}";
try {
    Porcupine handle = new Porcupine.Builder()
                        .setAccessKey(accessKey)
                        .setKeywordPath("path/to/custom/keyword/file")
                        .build();
} catch (PorcupineException e) { }
When initialized, valid sample rate can be obtained using handle.getSampleRate(). Expected frame length
(number of audio samples in an input array) is handle.getFrameLength(). The object can be used to monitor
incoming audio as below:
short[] getNextAudioFrame() {
    // .. get audioFrame
    return audioFrame;
}

while(true) {
    int keywordIndex = handle.Process(getNextAudioFrame());
    if(keywordIndex >= 0) {
        // .. detection event logic/callback
    }
}
Once you're done with Porcupine, ensure you release its resources explicitly:
handle.delete();
Flutter
Add the Porcupine Flutter plugin to your pub.yaml.
dependencies:
  flutter_porcupine: ^
The SDK provides two APIs:
High-Level API
PorcupineManager provides a high-level API that takes care of audio recording. This class is the quickest way to get started.
The static constructor PorcupineManager.fromBuiltInKeywords will create an instance of the PorcupineManager using one or more of the built-in keywords.
import 'package:porcupine_flutter/porcupine_manager.dart';
import 'package:porcupine_flutter/porcupine_error.dart';

// AccessKey obtained from Picovoice Console (https://console.picovoice.ai/)
final String accessKey = "{ACCESS_KEY}";

void createPorcupineManager() async {
    try {
        _porcupineManager = await PorcupineManager.fromBuiltInKeywords(
            accessKey,
            [BuiltInKeyword.PICOVOICE, BuiltInKeyword.PORCUPINE],
            _wakeWordCallback);
    } on PorcupineException catch (err) {
        // handle porcupine init error
    }
}
To create an instance of PorcupineManager that detects custom keywords, you can use the PorcupineManager.fromKeywordPaths static constructor and provide the paths to the .ppn file(s).
 // AccessKey obtained from Picovoice Console (https://console.picovoice.ai/)
final String accessKey = "{ACCESS_KEY}";

_porcupineManager = await PorcupineManager.fromKeywordPaths(
    accessKey,
    ["/path/to/keyword.ppn"],
    _wakeWordCallback);
Once you have instantiated a PorcupineManager, you can start/stop audio capture and wake word detection by calling:
try {
    await _porcupineManager.start();
} on PorcupineException catch (ex) {
    // deal with either audio exception
}
// .. use porcupine
await _porcupineManager.stop();
Once the app is done with using PorcupineManager, be sure you explicitly release the resources allocated to Porcupine:
await _porcupineManager.delete();
There is no need to deal with audio capture to enable wake word detection with PorcupineManager. This is because it uses flutter_voice_processor plugin to capture frames of audio and automatically pass it to the wake word engine.
Low-Level API
Porcupine provides low-level access to the wake word engine for those who want to incorporate wake word detection into an already existing audio processing pipeline.Porcupine has fromBuiltInKeywords and fromKeywordPaths static constructors.
import 'package:porcupine_flutter/porcupine_manager.dart';
import 'package:porcupine_flutter/porcupine_error.dart';

// AccessKey obtained from Picovoice Console (https://console.picovoice.ai/)
final String accessKey = "{ACCESS_KEY}";

void createPorcupine() async {
    try {
        _porcupine = await Porcupine.fromBuiltInKeywords(
          accessKey,
          [BuiltInKeyword.PICOVOICE]);
    } on PorcupineException catch (err) {
        // handle porcupine init error
    }
}
To search for a keyword in audio, you must pass frames of audio to Porcupine using the process function. The keywordIndex returned will either be -1 if no detection was made or an integer specifying which keyword was detected.
List buffer = getAudioFrame();

try {
    int keywordIndex = _porcupine.process(buffer);
    if (keywordIndex >= 0) {
        // detection made!
    }
} on PorcupineException catch (error) {
    // handle error
}
For process to work correctly, the provided audio must be single-channel and 16-bit linearly-encoded.
Finally, once you no longer need the wake word engine, be sure to explicitly release the resources allocated to Porcupine:
_porcupine.delete();
React Native
Install @picovoice/react-native-voice-processor and @picovoice/porcupine-react-native. The SDK provides two APIs:
High-Level API
PorcupineManager provides a high-level API that takes care of audio recording. This class is the quickest way to get started.
Using the constructor PorcupineManager.fromBuiltInKeywords will create an instance of the PorcupineManager
using one or more of the built-in keywords.
 // AccessKey obtained from Picovoice Console (https://console.picovoice.ai/)
const accessKey = "${ACCESS_KEY}";

async createPorcupineManager(){
    try {
        this._porcupineManager = await PorcupineManager.fromBuiltInKeywords(
            accessKey,
            [BuiltInKeywords.Picovoice, BuiltInKeywords.Porcupine],
            detectionCallback,
            processErrorCallback);
    } catch (err) {
        // handle error
    }
}
To create an instance of PorcupineManager that detects custom keywords, you can use the PorcupineManager.fromKeywordPaths
static constructor and provide the paths to the .ppn file(s).
// AccessKey obtained from Picovoice Console (https://console.picovoice.ai/)
const accessKey = "${ACCESS_KEY}";

this._porcupineManager = await PorcupineManager.fromKeywordPaths(
  accessKey,
  ["/path/to/keyword.ppn"],
  detectionCallback,
  processErrorCallback
);
Once you have instantiated a Porcupine manager, you can start/stop audio capture and wake word detection by calling:
let didStart = this._porcupineManager.start();
// .. use Porcupine
let didStop = this._porcupineManager.stop();
Once the app is done with using PorcupineManager, be sure you explicitly release the resources allocated to Porcupine:
this._porcupineManager.delete();
There is no need to deal with audio capture to enable wake word detection with PorcupineManager. This is because it uses @picovoice/react-native-voice-processor module to capture frames of audio and automatically pass it to the wake word engine.
Low-Level API
Porcupine provides low-level access to the wake word engine for those
who want to incorporate wake word detection into an already existing audio processing pipeline. Porcupine also has
fromBuiltInKeywords and fromKeywordPaths static constructors.
// AccessKey obtained from Picovoice Console (https://console.picovoice.ai/)
const accessKey = "${ACCESS_KEY}";

async createPorcupine(){
    try {
        this._porcupine = await Porcupine.fromBuiltInKeywords(
            accessKey, [BuiltInKeywords.PICOVOICE]);
    } catch (err) {
        // handle error
    }
}
To search for a keyword in audio, you must pass frames of audio to Porcupine using the process function. The keywordIndex returned will either be -1 if no detection was made or an integer specifying which keyword was detected.
let buffer = getAudioFrame();

try {
  let keywordIndex = await this._porcupine.process(buffer);
  if (keywordIndex >= 0) {
    // detection made!
  }
} catch (e) {
  // handle error
}
For process to work correctly, the provided audio must be single-channel and 16-bit linearly-encoded.
Finally, once you no longer need the wake word engine, be sure to explicitly release the resources allocated to Porcupine:
this._porcupine.delete();
Android
To include the package in your Android project, ensure you have included mavenCentral() in your top-level build.gradle file and then add the following to your app's build.gradle:
dependencies {
    implementation 'ai.picovoice:porcupine-android:${LATEST_VERSION}'
}
There are two possibilities for integrating Porcupine into an Android application.
High-Level API
PorcupineManager provides a high-level API for integrating Porcupine into Android applications. It manages all activities related to creating an input audio stream, feeding it into the Porcupine library, and invoking a user-provided detection callback.
import ai.picovoice.porcupine.*;

final String accessKey = "${ACCESS_KEY}"; // AccessKey obtained from Picovoice Console (https://console.picovoice.ai/)
final String keywordPath = "/path/to/keyword.ppn"; // path relative to 'assets' folder

try {
    PorcupineManager porcupineManager = new PorcupineManager.Builder()
                        .setAccessKey(accessKey)
                        .setKeywordPath(keywordPath)
                        .setSensitivity(0.5f)
                        .build(context,
                        new PorcupineManagerCallback() {
                            @Override
                            public void invoke(int keywordIndex) {
                                // detection event logic/callback
                            }
                        });
} catch (PorcupineException e) { }
Keyword files (.ppn) should be placed under the Android project assets folder (src/main/assets/).
Sensitivity is the parameter that enables developers to trade miss rate for false alarm. It is a floating point number within [0, 1]. A higher sensitivity reduces miss rate at cost of increased false alarm rate.
When initialized, input audio can be monitored using manager.start(). Stop the manager using by invoking
manager.stop(). When done be sure to release the resources using manager.delete().
Low-Level API
Porcupine provides a binding for Android. It can be initialized using:
import ai.picovoice.porcupine.*;

final String accessKey = "${ACCESS_KEY}";
final String keywordPath = "/path/to/keyword.ppn";
try {
    Porcupine porcupine = new Porcupine.Builder()
                        .setAccessKey(accessKey)
                        .setKeywordPath(keywordPath)
                        .setSensitivity(0.5f)
                        .build(context);
} catch (PorcupineException e) { }
Once initialized, porcupine can be used to monitor incoming audio.
private short[] getNextAudioFrame();

while (true) {
    final int keywordIndex = porcupine.process(getNextAudioFrame());
    if (keywordIndex != -1) {
        // detection event logic/callback
    }
}
Finally, be sure to explicitly release resources acquired by porcupine as the binding class does not rely on the garbage collector for releasing native resources.
porcupine.delete();
iOS
There are two approaches for integrating Porcupine into an iOS application.
High-Level API
PorcupineManager manages audio recording, passing it into Porcupine, and invoking the user-provided detection callback.
let accessKey = "${ACCESS_KEY}" // Obtained from Picovoice Console (https://console.picovoice.ai)
let modelPath: String = ... // Available at lib/common/porcupine_params.pv
let keywordPaths: [String] = ["/path/to/keyword/file/a", "/path/to/keyword/file/b"]
let sensitivities: [Float32] = [0.35, 0.64]
let keywordCallback: ((Int32) -> Void) = { keywordIndex in
    // Insert detection event logic
}

let manager = try PorcupineManager(
    accessKey: accessKey,
    modelPath: modelPath,
    keywordPaths: keywordPaths,
    sensitivities: sensitivities
    onDetection: keywordCallback)
When initialized, input audio can be monitored using manager.start(). When done be sure to stop the manager using
manager.stop().
Low-Level API
Porcupine.swift provides low-level access to the wake word engine for those who want to incorporate wake word detection into an already existing audio processing pipeline.
To construct an instance of Porcupine, pass it a keyword.
import Porcupine

let accessKey = "${ACCESS_KEY}" // Obtained from Picovoice Console (https://console.picovoice.ai)

do {
    Porcupine porcupine = try Porcupine(
      accessKey: accessKey,
      keyword: Porcupine.BuiltInKeyword.picovoice)
} catch { }
To search for a keyword in audio, you must pass frames of audio to Porcupine using the process function. The keywordIndex returned will either be -1 if no detection was made or an integer specifying which keyword was detected.
func getNextAudioFrame() -> [Int16] {
    // .. get audioFrame
    return audioFrame;
}

while true {
    do {
        let keywordIndex = try porcupine.process(getNextAudioFrame())
        if keywordIndex >= 0 {
            // .. detection made!
        }
    } catch { }
}
Once you're done with Porcupine you can force it to release its native resources rather than waiting for the garbage collector:
porcupine.delete();
Web
Porcupine is available on modern web browsers (i.e. not Internet Explorer) via WebAssembly. Microphone audio is handled via the Web Audio API and is abstracted by the WebVoiceProcessor, which also handles downsampling to the correct format. Porcupine is provided pre-packaged as a Web Worker.
Vanilla JavaScript and HTML (CDN Script Tag)
<!DOCTYPE html>
Vanilla JavaScript and HTML (ES Modules)
Install the web SDK using yarn:
yarn add @picovoice/porcupine-web @picovoice/web-voice-processor
(or)
npm install --save @picovoice/porcupine-web @picovoice/web-voice-processor
import { WebVoiceProcessor } from "@picovoice/web-voice-processor"
import { PorcupineWorker } from "@picovoice/porcupine-web";

const PORCUPINE_MODEL_BASE64 = /* Base64 representation of the `.pv` model file*/;

function keywordDetectionCallback(detection) {
  console.log(`Porcupine detected ${detection.label}`);
}

const porcupine = await PorcupineWorker.create(
  "${ACCESS_KEY}",
  PorcupineWeb.BuiltInKeyword.Porcupine,
  keywordDetectionCallback,
  { base64: PORCUPINE_MODEL_BASE64 },
);

console.log("WebVoiceProcessor initializing. Microphone permissions requested ...");
await WebVoiceProcessor.subscribe(porcupine);
console.log("WebVoiceProcessor ready and listening!");

...

// Finished with Porcupine? Release the WebVoiceProcessor and the worker.
if (done) {
  await WebVoiceProcessor.unsubscribe(porcupine);
  porcupine.release()
  porcupine.terminate()
}
React
yarn add @picovoice/porcupine-react @picovoice/web-voice-processor
(or)
npm install @picovoice/porcupine-react @picovoice/web-voice-processor
import { BuiltInKeyword } from '@picovoice/porcupine-web';
import { usePorcupine } from '@picovoice/porcupine-react';

function App(props) {
  const {
    wakeWordDetection,
    isLoaded,
    isListening,
    error,
    init,
    start,
    stop,
    release,
  } = usePorcupine();

  const initEngine = async () => {
    await init(
      ${ACCESS_KEY},
      [BuiltInKeyword.Porcupine],
      porcupineModel
    );
    await start();
  }

  useEffect(() => {
    if (wakeWordDetection !== null) {
      console.log(wakeWordDetection.label);
    }
  }, [wakeWordDetection])
}
NodeJS
Install NodeJS SDK:
yarn add @picovoice/porcupine-node
Create instances of the Porcupine class by specifying which keywords you want it to listen for:
const {
  Porcupine,
  BuiltinKeyword,
}= require("@picovoice/porcupine-node");

 // Obtained from the Picovoice Console (https://console.picovoice.ai/)
const accessKey = "${ACCESS_KEY}";

let handle = new Porcupine(
    accessKey,
    [BuiltinKeyword.GRASSHOPPER, BuiltinKeyword.BUMBLEBEE],
    [0.5, 0.65]);
GRASSHOPPER and BUMBLEBEE are built-in keywords. If you wish to use a custom keyword file, you need to identify its path:
const Porcupine = require("@picovoice/porcupine-node");

 // Obtained from the Picovoice Console (https://console.picovoice.ai/)
const accessKey = "${ACCESS_KEY}";

let handle = new Porcupine(
    accessKey,
    ["/path/to/custom/keyword/file"],
    [0.5]);
When instantiated, handle can process audio via its .process method.
let getNextAudioFrame = function() {
    ...
};

while (true) {
  let keywordIndex = handle.process(getNextAudioFrame());
  if (keywordIndex !== -1) {
    // detection event callback
  }
}
When done be sure to release resources acquired by WebAssembly using release():
handle.release();
C
Porcupine is implemented in ANSI C and therefore can be directly linked to C applications. include/pv_porcupine.h header file contains relevant information. An instance of Porcupine object can be constructed as follows.
// AccessKey obtained from Picovoice Console (https://console.picovoice.ai/)
const char *access_key = ...
// Available at lib/common/porcupine_params.pv
const char *model_path = ...
const char *device = "best";
const char *keyword_path = ...
const float sensitivity = 0.5f;

pv_porcupine_t *handle = NULL;
const pv_status_t status = pv_porcupine_init(
    access_key,
    model_path,
    device,
    1,
    &keyword_path,
    &sensitivity,
    &handle);
if (status != PV_STATUS_SUCCESS) {
    // Insert error handling logic
}
Sensitivity is the parameter that enables developers to trade miss rate for false alarm. It is a floating point number within [0, 1]. A higher sensitivity reduces miss rate (false reject rate) at cost of (potentially) increased false alarm rate.
Now the handle can be used to monitor incoming audio stream. Porcupine accepts single channel, 16-bit linearly-encoded
PCM audio. The sample rate can be retrieved using pv_sample_rate(). Finally, Porcupine accepts input audio in
consecutive chunks (aka frames) the length of each frame can be retrieved using pv_porcupine_frame_length().
extern const int16_t *get_next_audio_frame(void);

while (true) {
    const int16_t *pcm = get_next_audio_frame();
    int32_t keyword_index = -1;
    const pv_status_t status = pv_porcupine_process(handle, pcm, &keyword_index);
    if (status != PV_STATUS_SUCCESS) {
        // error handling logic
    }
    if (keyword_index != -1) {
        // Insert detection event callback
    }
}
Finally, when done be sure to release the acquired resources:
pv_porcupine_delete(handle);
Microcontroller
Porcupine is implemented in ANSI C and therefore can be directly linked to embedded C projects. Its public header file contains relevant information. An instance of the Porcupine object can be constructed as follows.
#define MEMORY_BUFFER_SIZE ...
uint8_t memory_buffer[MEMORY_BUFFER_SIZE] __attribute__((aligned(16)));

// AccessKey string obtained from Picovoice Console (https://console.picovoice.ai/)
static const char* ACCESS_KEY = ...

const uint8_t keyword_array[] = {...};

const int32_t keyword_model_sizes = sizeof(keyword_array);
const void *keyword_models = keyword_array;
const float sensitivity = 0.5f;

pv_porcupine_t *handle = NULL;

const pv_status_t status = pv_porcupine_init(
        ACCESS_KEY,
        MEMORY_BUFFER_SIZE,
        memory_buffer,
        1,
        &keyword_model_sizes,
        &keyword_models,
        &sensitivity,
        &handle);

if (status != PV_STATUS_SUCCESS) {
    // error handling logic
}
Sensitivity is the parameter that enables developers to trade miss rate for false alarm. It is a floating-point number within [0, 1]. A higher sensitivity reduces miss rate (false reject rate) at cost of increased false alarm rate.
Now the handle can be used to monitor incoming audio stream. Porcupine accepts single channel, 16-bit PCM audio. The
sample rate can be retrieved using pv_sample_rate(). Finally, Picovoice accepts input audio in consecutive chunks (aka
frames) the length of each frame can be retrieved using pv_porcupine_frame_length().
extern const int16_t *get_next_audio_frame(void);

while (true) {
    const int16_t *pcm = get_next_audio_frame();
    int32_t keyword_index;
    const pv_status_t status = pv_porcupine_process(handle, pcm, &keyword_index);
    if (status != PV_STATUS_SUCCESS) {
        // error handling logic
    }
    if (keyword_index != -1) {
        // detection event logic/callback
    }
}
Finally, when done be sure to release the acquired resources.
pv_porcupine_delete(handle);
Releases
v4.0.0 - December 11th, 2025
- Improved engine performance
- Added support for running on GPU or multiple CPU cores
- Node.js min version bumped to Node 18
- iOS min version bumped to iOS 16
- Flutter min version bumped to 3.10
- React Native min version bumped to 0.73
- Ended support for Unity
v3.0.0 - October 26th, 2023
- Improvements to error reporting
- Upgrades to authorization and authentication system
- Various bug fixes and improvements
- Added Farsi support for microcontrollers
- Node min support bumped to 16
- Unity editor min support bumped to 2021
- Patches to .NET support
v2.2.0 - April 12th, 2023
- Added language support for Arabic, Dutch, Hindi, Mandarin, Polish, Russian, Swedish and Vietnamese
- Added support for .NET 7.0 and fixed support for .NET Standard 2.0
- iOS minimum support moved to 11.0
- Improved stability and performance
v2.1.0 - January 20th, 2022
- Added macOS arm64 (Apple Silicon) support for Java and Unity SDKs
- Various bug fixes and improvements
v2.0.0 - Nov 25th, 2021
- Improved accuracy
- Added Rust SDK
- macOS arm64 support
- Added NodeJS support for Windows, NVIDIA Jetson Nano, and BeagleBone
- Added .NET support for NVIDIA Jetson Nano and BeagleBone
- Runtime optimization
v1.9.0 - December 2nd, 2020
- Added React Native SDK
- Added Java SDK
- Added .NET SDK
- Added NodeJS SDK
- Improved accuracy
- Runtime optimization
v1.8.0 - May 27th, 2020
- Improved accuracy
- Runtime optimization
v1.7.0 - Feb 13th, 2020
- Improved accuracy
- Runtime optimization
- Added support for Raspberry Pi 4
- Added service-based Android demo application
- Added C demo applications
- Updated documentation
v1.6.0 - April 25th, 2019
- Improved accuracy
- Runtime optimization
- Added support for BeagleBone
- iOS build can run on simulator now
v1.5.0 - November 13, 2018
- Improved accuracy
- Runtime optimization
- Added support for running within web browsers (WebAssembly)
v1.4.0 - July 20, 2018
- Improved accuracy
- Runtime optimizations.
- Updated documentation
v1.3.0 - June 19, 2018
- Improved accuracy
- Runtime optimizations
v1.2.0 - April 21, 2018
- Runtime optimizations
v1.1.0 - April 11, 2018
- Added multiple command detection capability
v1.0.0 - March 13, 2018
- Initial release
FAQ
You can find the FAQ here.