Immersive Language Learning with Live API
🚀 Try the Demo at immersive-language-learning.app
⚡️ Quick Deployment
Launch your own private instance of the app to Google Cloud in just one click. No local setup required.

This is an interactive language learning application powered by the Google Gemini Live SDK. It simulates real-world roleplay scenarios (e.g., buying a bus ticket, ordering coffee) to help users practice speaking in various languages with an AI that adopts perfectly reactive personas.


Features
- Missions & Roleplay: Chose from structured scenarios with specific objectives.
- Learning Modes:
- Teacher Mode: Get helpful explanations and translations in your native language.
- Immersive Mode: Strict "No Free Rides" policy where you must speak the target language to proceed.
- Native Language Support: Select your native language for tailored feedback and assistance.
- Proactive AI Persona: The AI adopts a specific role (e.g., "Bus Driver", "Friendly Neighbor"). And will only speak when necessary.
- Real-time Multimodal Interaction: Speak naturally with the AI, which responds with low-latency audio.
- Performance Scoring: Get graded on your fluency (Tiro, Proficiens, Peritus) with actionable feedback (Immersive Mode).
Tech Stack
- Frontend: Vanilla JavaScript, Vite, Web Audio API, WebSocket.
- Backend: Python, FastAPI,
google-genaiSDK. - Communication: WebSocket for full-duplex audio streaming.
Prerequisites
- Node.js (v18+)
- Python (v3.10+)
- Google Cloud Project with Vertex AI enabled.
- Google Cloud Application Default Credentials configured.
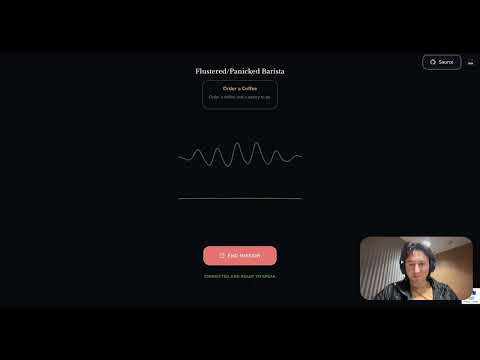
Video Walkthrough
Setup
1. Clone the repository
git clone
cd immersive-language-learning-with-live-api
2. Quick Install
Run the installation script to set up both backend (Python venv) and frontend (Node modules) dependencies:
./scripts/install.sh
3. Environment Config
Create a .env file in the root directory:
cp .env.example .env
Update .env with your Google Cloud details if necessary.
Running the Application
Development (Hot-Reload)
Start both the backend server and frontend development server with a single command:
./scripts/dev.sh
This will:
- Start the Python backend on port 8000.
- Start the Vite frontend dev server (usually port 5173).
- Enable
DEV_MODE(bypassing Redis/ReCAPTCHA). - Allow you to access the app at
http://localhost:5173.
Production Build
To serve the built frontend via the Python server:
- Build:
npm run build - Run Server:
python3 server/main.py - Access at
http://localhost:8000.
🚀 One-Click Production Deployment
The fastest way to get the app running in production is using Google Cloud Run:
- Click the button below:
- Follow the prompts in the Google Cloud Shell to authorize and deploy.
🛠 Manual Deployment (via deploy.sh)
If you prefer to deploy from your terminal, first create your own deployment script from the example:
cp scripts/example.deploy.sh scripts/deploy.sh
Edit scripts/deploy.sh with your project details, then run:
./scripts/deploy.sh
Advanced Configuration
To enable production features like metrics, bot protection, and scalable rate limiting, configure the following environment variables (defined in server/simple_tracker.py and server/main.py):
1. BigQuery Metrics
To track session start and page view events in BigQuery:
BQ_DATASET: Your BigQuery Dataset ID.BQ_TABLE: Your BigQuery Table ID.DEMO_NAME: (Optional) Name to identify this app in the metrics (default:your-app-name).
2. reCAPTCHA v3
To protect against bots:
RECAPTCHA_SITE_KEY: Your Google reCAPTCHA v3 site key.- Note: Ensure your Cloud Run URL is added to the allowed domains in the reCAPTCHA console.
3. Redis (Rate Limiting)
For scalable rate limiting across multiple container instances:
REDIS_URL: The URL of your Redis instance (e.g.,redis://10.0.0.1:6379/0).- Note: If using Memorystore for Redis, ensure your Cloud Run service is connected to the same VPC network.
🏃♂️ Get Started with Vibe-Coding in Google Antigravity
Build your own features, scenarios, or UI components in seconds using Google Antigravity. Whether you want to add a "Space Travel" mission or a new "Translator HUD," here is how to vibe-code your vision:
1. Open the Repository in Antigravity
Launch the workspace and point Antigravity to this folder. It will automatically ingest the GEMINI.md context file to understand the architecture.
2. Describe Your Vibe
Instead of writing boilerplate, just describe the feature you want.
- "Add a new mission called 'Mars Colony Arrival' where the AI acts as a customs officer."
- "Make the splash screen heading pulse with a holographic glow."
- "Add a 'Voice Select' dropdown to the HUD so I can pick Gemini's personality."
3. Iterate via Live Preview
Use the ./scripts/dev.sh hot-reloading server. As Antigravity writes the code, you'll see the UI update instantly. Tell it to "make the buttons more glassmorphic" or "shift the layout down for better balance" until it feels just right.
4. Deploy Your Build
Once you're happy with your changes, use the One-Click Deployment or use Antigravity's terminal to run ./scripts/deploy.sh to push your build directly to Google Cloud Run.
💰 Cost Analysis (Estimate)
NOTE: Pricing based on the Gemini 2.5 Flash Live API costs as of 19th January 2026 (Source: Google Cloud Pricing). Disclaimer: Usage metadata currently does not discern between input and output tokens. For a conservative estimate, we assume all tokens are billed at the higher output token rate.
Example Session: 1 Minute Conversation
Context: Teacher Mode (Audio + Transcript enabled), Duration 1:09.
| Modality | Token Count | Rate (Output)* | Cost Estimate |
|---|---|---|---|
| Audio | 1,324 | $12.00 / 1M | ~$0.0159 |
| Text | 518 | $2.00 / 1M | ~$0.0010 |
| Total | 1,842 | ~$0.017 (1.7 cents) |