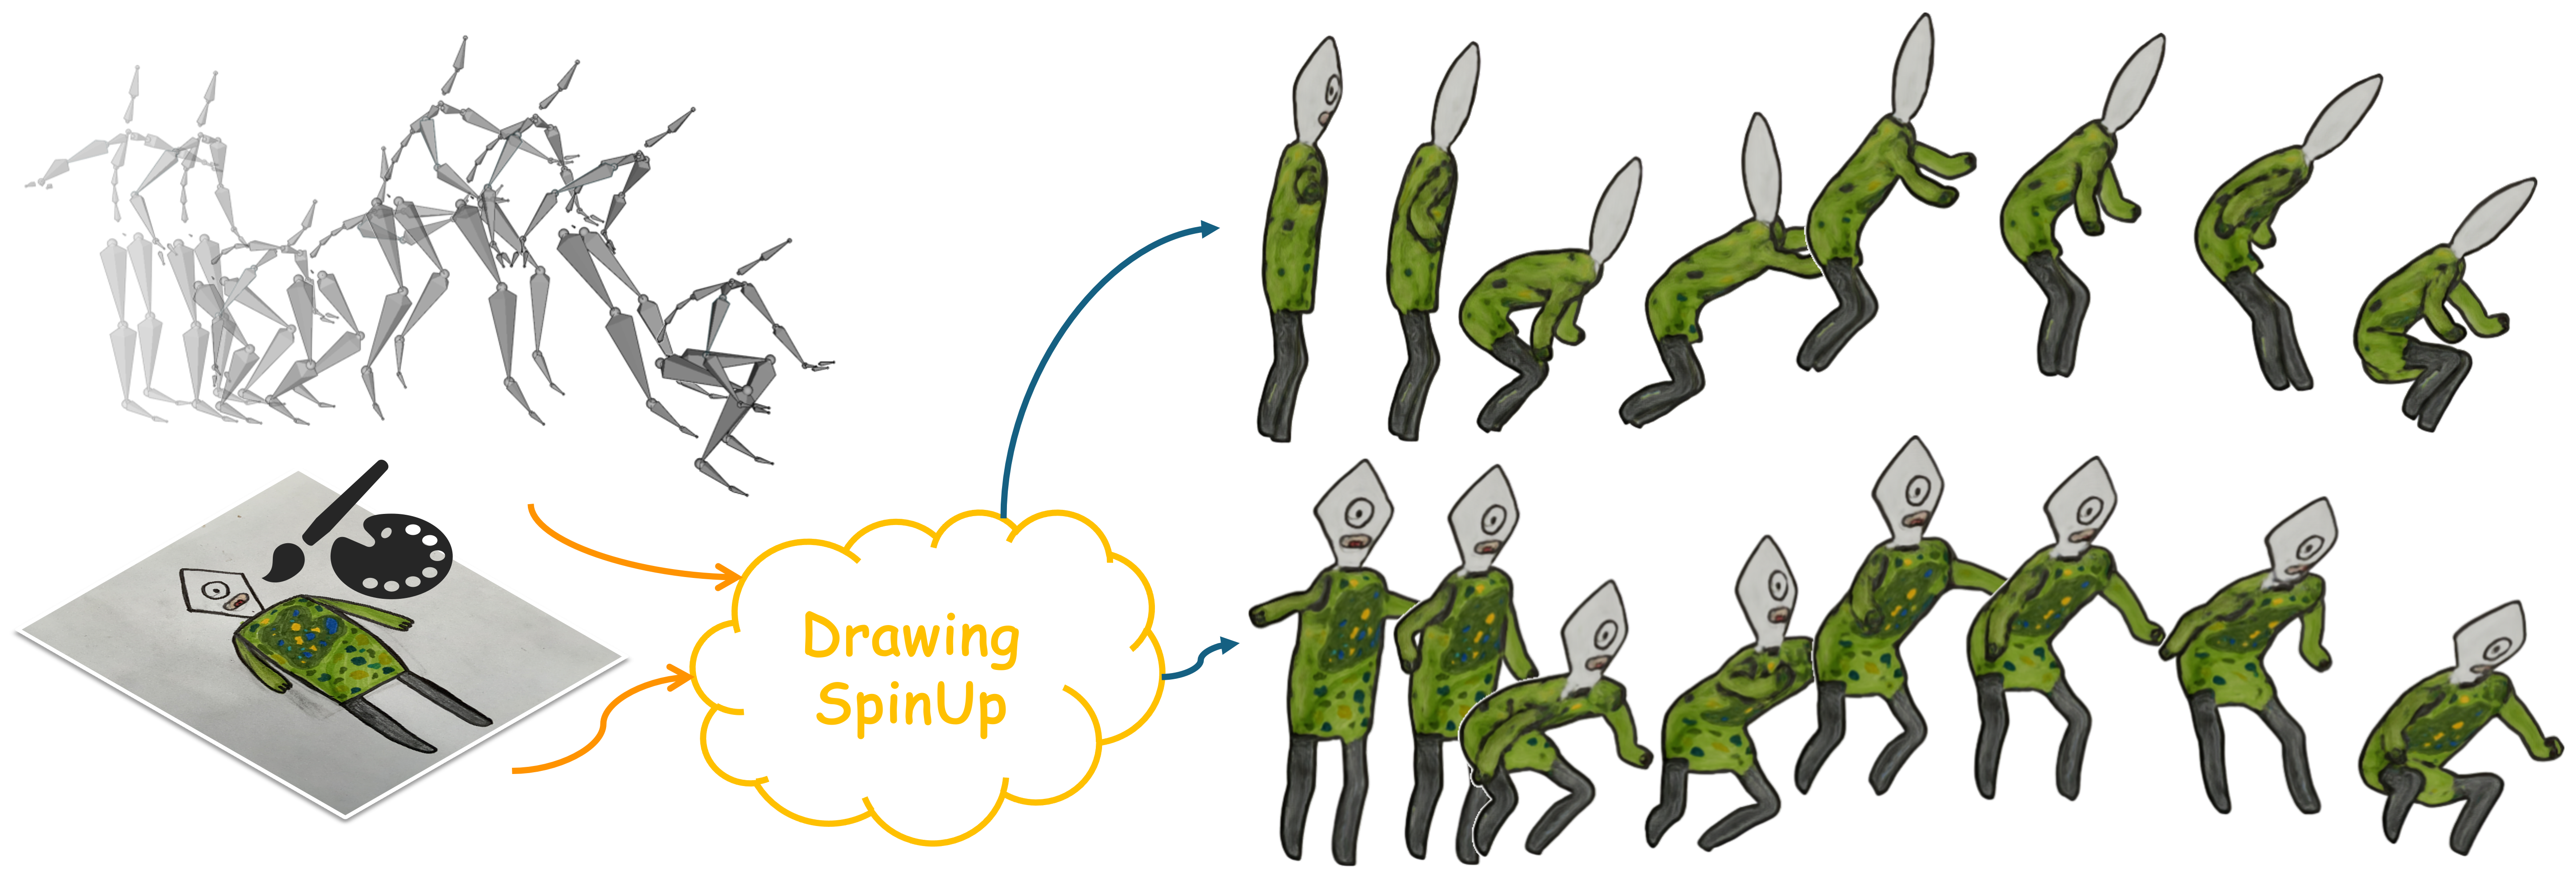
DrawingSpinUp: 3D Animation from Single Character Drawings (Siggraph Asia 2024)


Install
Hardware:
- All experiments are run on a single RTX 4090 GPU. (A single RTX 2080 Ti GPU is also OK.)
Setup environment:
- Python 3.8.20
- PyTorch 2.0.0
- Cuda Toolkit 11.8
- Ubuntu 22.04
Install the required packages:
conda create -n drawingspinup python=3.8
conda activate drawingspinup
pip install torch==2.0.0+cu118 torchvision==0.15.1+cu118 torchaudio==2.0.1+cu118 --extra-index-url https://download.pytorch.org/whl/cu118
pip install -r requirements.txt # only tested on diffusers[torch]==0.19.3, may have conflicts with newer versions of diffusers!!!
# tiny-cuda-nn
pip install git+https://github.com/NVlabs/tiny-cuda-nn/#subdirectory=bindings/torch
# python-mesh-raycast
git clone https://github.com/cprogrammer1994/python-mesh-raycast
cd python-mesh-raycast
python setup.py develop
cd ..
Clone this repository and download our 120 processed character drawings and reconstructed 3D characters from preprocessed.zip (a tiny subset of Amateur Drawings Dataset). Of course you can prepare your own image: a 512x512 character drawing 'texture.png' with its foreground mask 'mask.png'.
git clone https://github.com/LordLiang/DrawingSpinUp.git
cd DrawingSpinUp
# download blender for frame rendering
wget https://download.blender.org/release/Blender3.6/blender-3.6.14-linux-x64.tar.xz
tar -xvf blender-3.6.14-linux-x64.tar.xz
# install trimesh for blender's python
wget https://bootstrap.pypa.io/get-pip.py
./blender-3.6.14-linux-x64/3.6/python/bin/python3.10 get-pip.py
./blender-3.6.14-linux-x64/3.6/python/bin/python3.10 -m pip install trimesh
cd dataset/AnimatedDrawings
# download preprocessed.zip and put it here
unzip preprocessed.zip
cd ../..
Try A Toy
For convenience, here we offer an example ff7ab74a67a443e3bda61e69577f4e80 with two retargeted animation files. you can directly run the following scripts to generate two stylized animations.
dataset
  └── AnimateDrawings
      ├── drawings_uids.json
      ├── drawings_uids_thinning.json
      └── preprocessed
          └── ff7ab74a67a443e3bda61e69577f4e80
              ├── mesh
              │   ├── fbx_files
              │   │   ├── rest_pose.fbx
              │   │   ├── dab.fbx
              │   │   └── jumping.fbx
              │   └── it3000-mc512-f50000_c_r_s_cbp.obj
              └── char
                  ├── ffc_resnet_inpainted.png
                  ├── mask.png
                  ├── texture.png
                  └── texture_with_bg.png
The 'mesh/fbx_files/rest_pose.fbx' is the rigged character generated by Mixamo. The 'mesh/fbx_files/dab.fbx' and 'mesh/fbx_files/jumping.fbx' are two retargeted animation files.
cd 3_style_translator
# render keyframe pair for training
python run_render.py --uid ff7ab74a67a443e3bda61e69577f4e80
# The default rendering engine is 'BLENDER_EEVEE' (faster rendering) and you can change it to 'CYCLES' by:
# python run_render.py --uid ff7ab74a67a443e3bda61e69577f4e80 --engine_type CYCLES
# stage1 training
python train_stage1.py --uid ff7ab74a67a443e3bda61e69577f4e80
# stage2 training
python train_stage2.py --uid ff7ab74a67a443e3bda61e69577f4e80
# render frames for inference
python run_render.py --uid ff7ab74a67a443e3bda61e69577f4e80 --test
# inference
python test_stage1.py --uid ff7ab74a67a443e3bda61e69577f4e80
python test_stage2.py --uid ff7ab74a67a443e3bda61e69577f4e80
# generate GIF animation
python gif_writer.py --uid ff7ab74a67a443e3bda61e69577f4e80
cd ..

Step by Step
Assuming you have now drawn a character, you need:
- process it to a size of 512x512 and obtain its mask, then give it a name (e.g, 'xxx'), namely, so-called uid.
- remember write this new uid into the 'drawings_uids.json' and 'drawings_uids_thinning.json' (if need thinning operation).
dataset
  └── AnimateDrawings
      ├── drawings_uids.json
      ├── drawings_uids_thinning.json
      └── preprocessed
          └── xxx
              └── char
                  ├── mask.png
                  ├── texture.png
                  └── texture_with_bg.png
Step-1: Contour Removal
We use FFC-ResNet as the backbone to predict the contour region of a given character drawing. For model training, you can refer to the original repo. For training image rendering, see 1_lama_contour_remover/bicar_render_codes which are borrowed from Wonder3D. Here we focus on inference. Download our pretrained contour removal models from experiments.zip.
cd 1_lama_contour_remover
# download experiments.zip and put it here
unzip experiments.zip
python predict.py
cd ..
Then you will get:
dataset
  └── AnimateDrawings
      ├── drawings_uids.json
      ├── drawings_uids_thinning.json
      └── preprocessed
          └── xxx
              └── char
                  ├── ffc_resnet_inpainted.png
                  ├── mask.png
                  ├── texture.png
                  └── texture_with_bg.png
Step-2: Textured Character Generation
Firstly please download the pretrained isnet model (isnet_dis.onnx) for background removal of generated multi-view images.
cd 2_charactor_reconstructor
mkdir dis_pretrained
cd dis_pretrained
wget https://huggingface.co/stoned0651/isnet_dis.onnx/resolve/main/isnet_dis.onnx
cd ..
Then generate multi-view images and fuse them into a textured character.
# multi-view image generation
python mv.py --uid YOUR_EXAMPLE_ID
# textured character reconstruction
python recon.py --uid YOUR_EXAMPLE_ID
cd ..
Then you will get:
dataset
  └── AnimateDrawings
      ├── drawings_uids.json
      ├── drawings_uids_thinning.json
      └── preprocessed
          └── xxx
              ├── mesh
              │   └── it3000-mc512-f50000_c_r_s_cbp.obj
              └── char
                  ├── ffc_resnet_inpainted.png
                  ├── mask.png
                  ├── texture.png
                  └── texture_with_bg.png
Step-3: Stylized Contour Restoration
1) Rigging & Retargeting
- Once we get the textured character, we use Mixamo to rig it automatically and download the rigged character in rest pose as 'mesh/fbx_files/rest_pose.fbx'.
- Then we can directly retarget a Mixamo motion (e.g., jumping) onto the rigged character online and download the character with animation as 'mesh/fbx_files/jumping.fbx'. We can also use rokoko-studio-live-blender to retarget a 3D motion (e.g., *.bvh, *.fbx) onto the rigged character offline to generate the animation fbx file.
Then you will get:
dataset
  └── AnimateDrawings
      ├── drawings_uids.json
      ├── drawings_uids_thinning.json
      └── preprocessed
          └── xxx
              ├── mesh
              ├── fbx_files
              │   │   ├── rest_pose.fbx
              │   │   └── jumping.fbx
              │   └── it3000-mc512-f50000_c_r_s_cbp.obj
              └── char
                  ├── ffc_resnet_inpainted.png
                  ├── mask.png
                  ├── texture.png
                  └── texture_with_bg.png
2) Rendering & Training & Inference
We need to train a model for each sample. Once trained, the model can be applied directly to any new animation frames without further training.
cd 3_style_translator
# for headless rendering
export DISPLAY=:1
# render keyframe pair for training
python run_render.py --uid YOUR_EXAMPLE_ID
# stage1 training
python train_stage1.py --uid YOUR_EXAMPLE_ID
# stage2 training
python train_stage2.py --uid YOUR_EXAMPLE_ID
# render frames for inference
python run_render.py --uid YOUR_EXAMPLE_ID --test
# inference
python test_stage1.py --uid YOUR_EXAMPLE_ID
python test_stage2.py --uid YOUR_EXAMPLE_ID
# generate GIF animation
python gif_writer.py --uid YOUR_EXAMPLE_ID
cd ..
Acknowledgements
We have intensively borrow codes from the following repositories. Many thanks to the authors for sharing their codes.
Further Work
- Our further work From-Rigging-to-Waving is released! Welcome to read it!
Citation
If you find this repository useful in your project, please cite the following work. :)
@inproceedings{zhou2024drawingspinup,
  author    = {Zhou, Jie and Xiao, Chufeng and Lam, Miu-Ling and Fu, Hongbo},
  title     = {DrawingSpinUp: 3D Animation from Single Character Drawings},
  booktitle = {SIGGRAPH Asia 2024 Conference Papers},
  year      = {2024},
}